Cherry Pie | Twin Peaks

They got a cherry pie there that’ll kill ya!
Agent Dale Cooper
Twin Peaks
A second remake of this fabulous Twin Peaks inspired cherry pie. I’ve had a request from Gammon Creations to make a number of diner-style desserts for their upcoming video game with a restaurant aesthetic. It will include accessing recipes and whatnot as you go through it. Super keen to have my recipes and creations as part of the game!
When I was asked my mind went pretty quickly to Twin Peaks, and the pie i had already made previously - but unfortunately burnt. This version is much nicer, with a tarty, intense filling that, much like Agent Cooper would say, will kill ya!
I, like many I am sure, have a special place in my heart for Twin Peaks. It was introduced to me by an ex. Despite the ex being quite awful, Twin Peaks is something that stayed with me. I can’t even think about how many times I’ve watched the first two seasons, when the third season was announced I got a tad excited and ended up going out and getting a Twin Peaks dedicated tattoo in celebration. No regrets.
Anyway, below is a recipe for a cherry pie that may just kill ya. Enjoyed best with a cup of black coffee and a mystery to solve.
*Note: if using fresh cherries make sure they are all pitted. If using canned or jarred, make sure they are well drained.
Cinnamon Rolls
Makes one 9” pie
Ingredients
Pie case
500g plain flour
2 tbsp raw caster sugar
200g butter, cold
180ml water, ice-cold
Pinch salt
Filling
1kg cherries *see note
1 tsp ground cinnamon
1 tbsp lemon juice
2 tbsp brown sugar
1 1/2 tbsp corn flour
’Egg wash’
1 tbsp maple syrup
2 tbsp milk
Pie case
Combine the flour, sugar and salt in a large bowl. Using your fingers to rub the cold butter into the flour mixture until it resembles wet sand.
Made a well in the middle of the flour and butter mixture and pour in the ic water. Mix until it comes together as a firm dough. Wrap in cling wrap and place in the fridge for 30 minutes minimum to chill.
Filling
Combine the filling ingredients, and mix to ensure that the corn flour has coated all the cherries evenly. Place to the side.
Preheat your oven to 180C. Using a little butter or vegetable oil, grease a pie case well and place to the side.
Remove the chilled dough from the fridge and place it on a lightly floured surface. Roll out to a thickness of around 2 cms and gently place into the prepared pie case, pressing it down into the edges and letting the excess hang over the sides of the case.
Fill your prepared pie case with the cherry filling you made. Cut off the excess pie dough that is hanging from the edge of the case, and use your fingers to press the remaining dough into a crust around the edge.
Combine the maple syrup and milk together and use this to brush the pie crust as an ‘egg wash’. Place the pie into the oven for 20 minutes, before reducing the heat to 180C and baking for an additional 30 - 40 minutes. The filling should be bubbling, while the crust around the edges should be a golden brown.
Remove the pie from the oven when done, leave to cool before serving and enjoy!
Honey Pear Tarts | Circe

‘I made you honeyed pears,’ I said.
He held up his hands, showing a half-eaten fruit, shining with juice. ‘I found them, thank you.’ He paused. ‘I have something to show you.’
Circe
Madeline Miller
I’ve always had so much motivation and ideas I want to achieve. I pick up hobbies at an incredible rate - the spare room in my apartment has boxes filled with gardening supplies, a sewing machine, knitting and crochet supplies, to name a few.
This blog was one such hobby, I’ve found it hard to focus on it in the last few years. Starting recipes or taking photos and finding it impossible to finish them. It’s only in the last month I received a diagnosis for ADHD and medication for it. And suddenly things make a lot more sense. I can finally finish things. It’s like my brain has become coherent.
I’m excited to see if I can keep this coherency, especially for this blog. Making recipes, taking the photos - brings me such joy. I was so happy to kick the year off with a recipe from Circe. A book that I absolutely loved. What weird kid in school wasn’t obsessed with Greek mythology?
There are so many vivid descriptions of food in this book, with beautiful descriptions of wild strawberries and platters of meats and cheeses. The idea of honeyed pears were most appealing though. I first tried a roasted pear and honey ice-cream, but couldn’t get it quite right. But these tarts ended up absolutely incredible. A very easy recipe if you want to impress someone at a dinner.

Honey Pear Tarts
Makes 6-7 small tarts or 1 big tart
Ingredients
Tart shell
800g biscuits (I used digestives and chocolate ripple biscuits)
115g butter, melted
Filling
400g cream
150ml milk
100g raw caster sugar
50g honey or substitute + 20g
2 tbsp cornflour
1tsp agar agar
1 tsp vanilla extract
Sea salt
3-4 pears, peeled, cored and cut in half
Juice of one lemon
Tart crust
Using a blender or a food processor crush the biscuits until they are very fine. You can also put them under a tea towel and use a rolling pin to go over them if you do not have a blender etc.
Combine the crushed biscuits and melted butter, mixing well. Prepare your tart case/s by lightly greasing them, before pushing the biscuits mix into each one firmly until it covers the bottom and the sides. You don’t want it to be too thick here, but it needs to keep its shape.
Place the prepared tart crusts into the freezer for 20 minutes. While they are chilling preheat your oven to 180C. Bake the chilled tarts for approx. 10 minutes or until they have darkened in colour. If you’re making it with chocolate biscuits, follow the time instead of the colour. Remove them from the oven and place to the side to cool completely.
Filling
Combine the milk and cornflour together, mixing well until there are no lumps. In a saucepan, place the milk mixture, cream, sugar, and honey and heat over a medium-low heat. After about five minutes, add in the agar agar, vanilla and a pinch of salt.
Continue to stir the filling mixture until it begins to thicken. Once it has thickened to the point that it heavily coats the back of a spoon you can remove it from the heat. Carefully distribute the filling mixture into the prepared tart cases. Place them into the fridge overnight to cool and set.
These are delicious as is - but even better when you add a honey roasted pear on top. Preheat your oven to 180C, and line a baking tray with baking paper. Place the pears face down on the tray and brush the lemon juice over them. Drizzle the extra 20g of honey over the top and add a pinch of sea salt.
Bake for approx. 25 minutes or until they are golden. Remove from the oven and leave to cool. Once the tarts have set and the pears have cooled, place them on top and enjoy!
Lemon Tart | Nakano Thrift Shop

'Hitomi, you must like pie.' '
Excuse me?'
’See here- cherry pie, lemon pie, millefeuille, and apple pie.’
Like a bird singing, Masayo cheerily recited the different pastries I had brought from Posy.
Nakano Thrift Shop
Hiromi Kawakami
My motivation is slowly coming back to me and that means the urge to read and bake is also returning. I haven’t read a book entirely for a good three months, I’ve had zero motivation and energy - turns out lockdown number 6 hits the hardest.
A friend from work dropped off an utter abundance of lemons from her mother’s backyard though, and trawling through previously dogmarked pages of books on my shelves made he glance to Nakano Thrift Shop - a delightful and surprisingly moving read. Obviously the mention of a lemon pie jumped out at me as i had a ridiculous amount of lemons to use up.
This tart is creamy with a perfect balance of sweet and sour. it’s perfect for the warming days of spring and so easy to make.
Lemon Tart
Ingredients
Tart case
420g plain flour
40g raw caster sugar
180g cold butter
150ml cold milk
Filling
200ml of lemon juice
Zest of 1 lemon
350ml coconut cream
2 tbsp corn flour
1/2 tsp agar agar
1 tsp vanilla extract
300g raw caster sugar
1/2 tsp tumeric powder
Combine the flour, sugar and butter together in a bowl. Using your fingers to rub the butter into the dry ingredients until it resembles wet sand.
Make a well in the middle and pour in the milk, mixing until it comes together with no lumps. Wrap in plastic and refrigerate for at least 30 minutes before use.
Once your tart pastry is ready, prepare a loose bottom tart pan by greasing the sides and bottom well. Preheat the oven to 160C.
Roll out the pastry until it is about 2 cms thick and then gently press it into the prepared case, let it hang over the edge and trim it until it is neat.
Line the tart case with baking paper and use dried beans, rice or baking beans to weigh it down before blind baking for 15 minutes with the pastry weighed down. And then another 10 without it. Remove and put to the side to cool.
To prepare the filling, in a medium saucepan combine the sugar, lemon juice, agar agar, corn flour and vanilla. Mix well.
Heat on a medium heat until it begins to thicken, making sure to continually stir to stop it sticking to the bottom. Now is a good time to stir in the turmeric powder, to give it a nice yellow colour.
Once the filling has thickened - if you draw a spoon across the top the drag marks should remain, you can remove from the heat. Pout into the prepared tart case and leave to cool for 3 hrs to overnight. Top with fruit or whatever you like and enjoy!
Pumpkin Pie | The Legend of Sleepy Hollow

And then there were apple pies, and peach pies, and pumpkin pies; besides slices of ham and smoked beef; and moreover delectable dishes of preserved plums, and peaches, and pears, and quinces; not to mention broiled shad and roasted chickens; together with bowls of milk and cream.
The Legend of Sleepy Hollow
Washington Irving
It’s that wonderful time of the year again - everyone’s (well, America’s) favourite holiday, Halloween! I’ve mentioned before that Halloween was never that much of a holiday when I was growing up in Australia. Now days I tend to see children roaming the streets trick or treating most years, and every 5th house or so on the block adorned in pumpkins and some cobwebs. I think you really need to be in a metro area though for it to be relevant to anyone.
It was a shock to some American friends of mine that I had never in my life tried pumpkin pie as well. I’m sure many people in Australia have had it before, but it is definitely not a regular appearance at any holiday or dinner table that I know of. Considering I had never tried it before, it seemed appropriate to make one for Halloween this year. Especially considering it’s one of the many delights that appears on the feast table within the Legend of Sleepy Hollow.
Most of the recipes I found when researching pumpkin pie contained a crazy amount of sugar and the use of canned pumpkin. We don’t really have canned pumpkin in Australia, and adding that much sugar to a dish containing vegetables felt sort of weird. Instead, baking a fresh pumpkin leaves you with a caramelised, sweet result - so the addition of a little more maple syrup and the coconut cream is enough to turn a savoury vegetable into a sweet dessert.
Pumpkin Pie
Ingredients
Pie crust
450g plain flour
190g cold butter, broke into pieces
180ml ice water
1 tsp salt
2 tbsp caster sugar
Filling
1 small pumpkin
2 tbsp maple syrup
4 tbsp corn flour
120ml coconut cream
2 tsp ground cinnamon
1 tsp ground nutmeg
2 tsp ground ginger
1 tsp ground cloves
1 tsp vanilla extract
Preheat your oven to 180C, and prepare a baking tray with a layer of baking paper. Slide the pumpkin into wedges, laying them out single layer on the prepared baking paper. Bake for about 30 minutes, or until the slices of pumpkin are soft. Remove from the oven and leave to cool.
Peal the skin from the cooked slices of pumpkin, ensuring that you remove any of the seeds. Place the cooked pumpkin into a blender or a food processor and puree. Depending how watery the type of pumpkin you got is, you may need to leave it wrapped in a cheesecloth or in a sieve overnight to get the excessive water out. I used a Japanese pumpkin, doesn’t tend to be very watery so I was able to use it straight away. You need approximately 500g of pumpkin puree for the pie, so make sure you have enough once you’ve drained the water out.
If you need to leave the water to drain from the pureed pumpkin, it’s a good time to make the pie crust in-between. Combine the flour, salt, sugar and the butter, using your fingertips to rub the butter into the flour until it resembles wet sand.
Make a well in the middle and pour in the water, mixing until a dough forms. Try not to overwork it during this time otherwise it can end up quite tough. Wrap the formed dough in cling wrap and refrigerate for at least 30 minutes.
Preheat oven to 200C. Once the dough has been refrigerated for long enough, remove from the plastic wrap and roll out into a circle large enough to fit into a 26cm pie dish.
Place the dough into a greased pie dish, pressing it down into the edges fully. Lay a piece of baking paper onto the dough and fill with baking beans, place it into the oven and bake for 20 minutes - if the edges of the crust start to get too dark, you can wrap some foil around them. Remove from the oven and leave to cool.
Back to the filling. Combine the corn flour and the coconut cream, use a form to properly whisk it together, ensuring no corn flour lumps remain.
Add the coconut cream and corn flour mix, maple syrup, all the spices, and the vanilla into the pumpkin puree, mixing well. Pour the filling into the prepared pie crust, reduce the oven heat to 180C and bake for approx. 35 minutes. It is done when you can gently shake the dish and the middle has a slight jiggle but the rest remain firm. Leave to cool before cutting.
Apple and Raisin Tart | The Woman in Black
The landlord recommended a glass of mulled wine, which I drank sitting before the fire, listening to the murmur of voices on the other side of the heavy door leading to the public bar, and his wife made my mouth water in anticipation of the supper she proposed - home-made broth, sirloin of beef, apple and raisin tart with cream, and some Stilton cheese.The Woman in BlackSusan Hill
The landlord recommended a glass of mulled wine, which I drank sitting before the fire, listening to the murmur of voices on the other side of the heavy door leading to the public bar, and his wife made my mouth water in anticipation of the supper she proposed - home-made broth, sirloin of beef, apple and raisin tart with cream, and some Stilton cheese.
The Woman in Black
Susan Hill
Winter has well and faded from my life now, and the sunny weekends that are beginning to spring up are just more of an indication. It's a little odd this side of the world - Halloween was never part of my childhood, outside of the odd mention of it in American television shows or movies, but there was never a night spent trick or treating or dressing up. It seems to be creeping further into Australian culture these days - in cities at least, and I've spent the last few years handing out lollies and icy poles to costumed children each Halloween evening.
A little of the atmosphere of Halloween is lost without the autumn months, instead of pumpkins and falling leaves, we have sunshine and new plants sprouting everywhere. This hasn't gotten in the way of my pre-Halloween reading though, even if it does leave me craving stormy weather and mulled wine.

My latest spooky read in preparation was the classic, The Woman in Black. I flew through this book - as someone that does not enjoy horror films (I should probably stop saying this, as I do like well made horror more so), I thoroughly do enjoy a bit of a scary story in book form. My only other glimpse to the plot of the book was a viewing of the play, The Woman in Black, something that is so incredibly well done I cannot emphasise enough that people should see a production of it when they have the chance.
In line with the somewhat autumn style that Halloween and the almost cosy atmosphere that comes along with it, the food within The Woman in Black has that warmth to it also. Mulled wine, roasted hunks of meat and an array of tarts. We have quite lovely apples throughout the year in Australia luckily, and I really can't go past my favourite, the Granny Smith. It's somewhat sour, tarty and my childhood years were basically formed around having a slightly chilled on in my lunchbox to munch into every recess. In this tart, they turn into a caramelised deliciousness that will have you eating an entire tart in one sitting. True story.
Apple and Raisin Tart
Serves around 6 people
Ingredients
Crust
550g plain flour
50g caster sugar
220g butter, broken into pieces
185ml milk
Filling
4 apples, I use Granny Smith usually
30g brown sugar
30g caster sugar
1 tsp cinnamon
1 lemon, juiced
300g apricot jam
Pinch of sea salt
Start the crust of the tart by combining the butter, flour and caster sugar together into a bowl. Use your hands to work the butter into the flour and sugar until it resembles wet sand. Make a hole in the middle and add in the milk, mix until there are no lumps and it comes together into a ball. Wrap in cling wrap and place in the fridge for at least 30 minutes before using.
Preheat your oven to 180C approximately half an hour before you're planning to roll the dough. Once the dough has chilled for long enough, remove it from the fridge and roll it out thinly - you should be able to press it into the edges of a tart case without it tearing, but keeping in mind not to have it too thick. Line the dough in the case with baking paper and using baking beans, actual dried beans or rice, weigh the paper down and blind bake the tart case for about 20 minutes. Remove and leave to the side to cool. You can leave the oven on at this stage if you're planning on preparing the rest of the tart straight away.
Core each of the apples (you can peel if you want, I tend not to) and slice them thinly. You can do this part however you like - if you want it to be quite neat try and keep each slice the same size, but it really doesn't matter.
Once all the apples have been sliced place them into a bowl with the lemon juice, the sugars, cinnamon and sea salt. Mix well so that the sugar and cinnamon covers every slice of apple.
Heat the apricot jam lightly until it begins to soften and melt a little - place to the side.
Spread a thin layer of the apricot jam across the bottom of the blind baked tart case so it covers the whole bottom of the tart. Place the apple slices across this until they are all in the tart case (any pattern you want to do it fine). Try and avoid getting too much liquid into the tart at this stage, otherwise it will make the bottom quite soggy.
Glaze the prepared tart with any remaining apricot jam and place into the oven for 30 minutes or until the apples have softened and the tart case is a golden brown. Remove and let cool before serving. Enjoy!
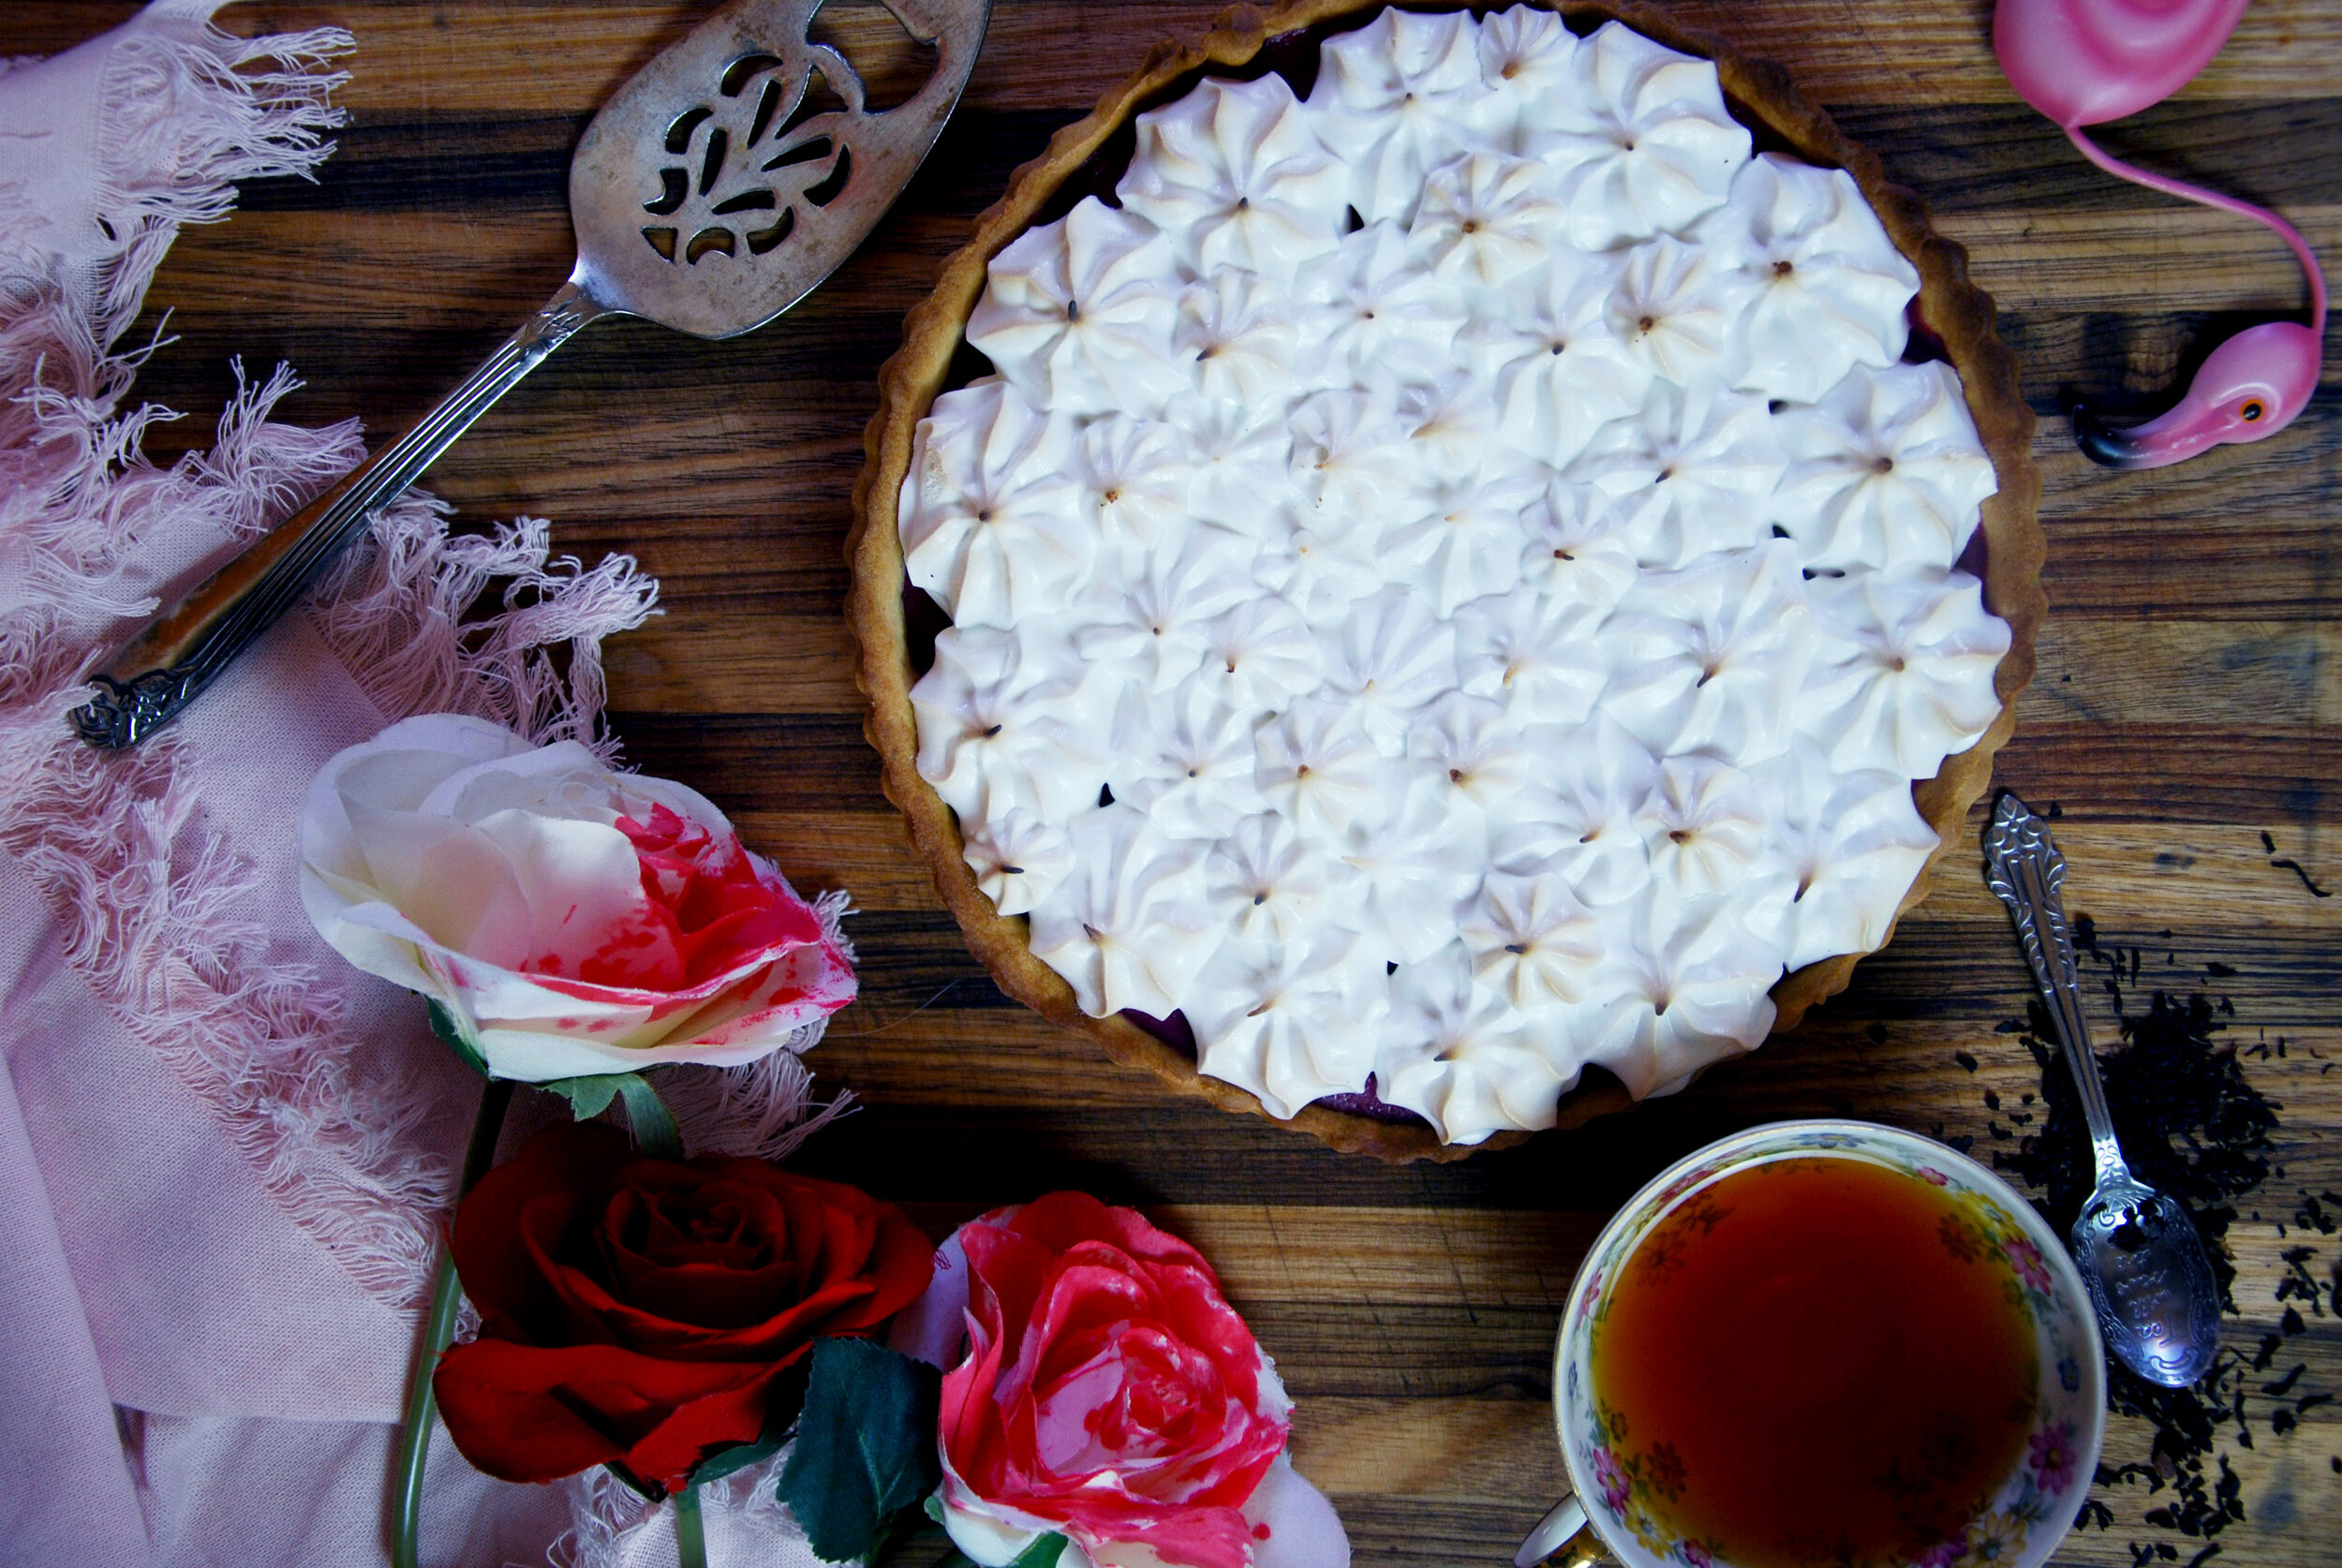
Raspberry Meringue Tart | Alice's Adventures in Wonderland
"The Queen of Hearts, she made some tarts,All on a summer day:The Knave of Hearts, he stole those tarts,And took them quite away!"- Alice's Adventures in Wonderland
‘The Queen of Hearts, she made some tarts,
All on a summer day:
The Knave of Hearts, he stole those tarts,
And took them quite away!"
Alice's Adventures in Wonderland, Lewis Caroll
When I first moved to Melbourne at the age of 19, I began working at a tiny cafe near my house. Looking back - getting paid $14 an hour and working ridiculous shifts, really wasn't worth it or really that legal unfortunately. However, it did mean that I met a very good friend of mine, Laura. Her and her partner were regulars at the cafe, coming in almost every weekend. When I stopped working there, it was quite sudden and I did not have the opportunity to really say good to anyone - only a few months later though, at a showing of Harry Potter and the Deathly Hallows Pt 2 I spotted Laura, perched outside with a wand ready. We exchanged contact details - and since then, her and her partner have moved to Brisbane, but we've also travelled together and put effort in to make sure that we see most Marvel movies together.

She is also a absolutely huge Alice in Wonderland fan, and this year I planned an Alice in Wonderland Tea Party for her when she was down visiting. A weekend of op-shopping and cooking ensured that I put together a tea party that would make the Mad Hatter proud and leave all guests tumbling down the rabbit hole.Despite theming the whole tea party around Alice in Wonderland, I sort of missed out on making what I really wanted to, the Queen of Hearts' tart. So, obviously the solution was to wait till a rainy night months later to attempt to make it.
You will need a 25cm tart case and ideally a candy thermometer and a standmixer/electric beater but can be done without. You can use this method if you don’t have a candy thermometer https://www.thespruceeats.com/making-candy-without-a-candy-thermometer-520309.
*Note: if using fresh raspberries, up the ¼ cup of milk to ¾ a cup.
Raspberry Meringue Tart
Makes one large tart (25cm across)
Tart Pastry
550g plain flour
50g caster sugar
220g butter
185ml milk
Raspberry Filling
1 cup caster sugar
½ cup corn flour
1 tsp agar agar powder
1 lemon, zested and juiced
200g raspberries, fresh or frozen
¼ cup milk *see note
½ tsp vanilla extract
Meringue
½ cup chickpea liquid (the juice from a can of chickpeas!)
½ tsp cream of tartar60ml water
1 1/2 cup caster sugar
1 tsp agar agar powder
Tart Pastry
Combine the sugar and flour in a large mixing bowl, adding in pieces of the butter and using your fingers to mix them. The result should resemble wet sand.
Make a well in the middle and pour in the milk, mixing until the pastry comes together into a ball.
Wrap in cling wrap and refrigerate for at least 30 minutes before use.
Preheat oven to 160C.
When the dough has had time to rest, prepare a 25cm tart case with cooking spray or butter.
Lightly dust a surface with flour and roll out the pastry dough until it approx. 5mm thick – ensure that the pastry has been rolled out to a sixe wider than the tart case and gently place the pastry into the prepared case, pressing the pastry into the corners. Trim any overhanging edges.
Line the pastry with baking paper, using baking beads or even rice/dried beans to weight it down. Blind bake for 20 minutes and leave to cool.
Raspberry Filling
Place all ingredients into a medium sized saucepan on a medium heat. Ensure that all ingredients have been well mixed together – mashing the raspberries when necessary.
Continue to heat on medium, stirring occasionally until the mixture resembles that of a pudding consistency.
Remove from heat and strain the mix through a fine mesh sieve or some cheesecloth – essentially you’re just trying to get all the seeds from the raspberries out. If you prefer you can totally leave them in.
Pour the raspberry filling into the prepared pastry and refrigerate overnight or at least for three hours (it will take a little while to set properly).
Meringue
Combine the chickpea liquid and the cream of tartar together and beat until stiff peaks form. It will take a few minutes – probably longer if you’re doing this by hand, though it is an amazing workout.
Combine the agar agar, water and sugar together in a small saucepan – heating until it reaches around 112C.
While beating the meringue, slowly pour in the hot sugar mixture, continuing to beat for the next 8 minutes or so – until the meringue has cooled.
When the meringue is ready, you can either use a piping bag or just a spoon to pop the meringue on top of the prepared raspberry tart – as much as you like.
A blowtorch is best – but if you don’t have one, like me, you can pop the tart into a low heat oven for a little or even use a few matches (I did this – didn’t work that great).
Leave for about 30 minutes to let the meringue set a little before cutting into the tart. Enjoy!