Chocolate Cake | Call Me by Your Name
When I looked at my dessert plate and saw the chocolate plate speckled with raspberry juice, it seemed to me that someone was pouring more and more red sauce than usual, and that the sauce seemed to be coming from the ceiling above my head until it suddenly hit me that it was steaming from my nose.Call Me by Your NameAndré Aciman
When I looked at my dessert plate and saw the chocolate plate speckled with raspberry juice, it seemed to me that someone was pouring more and more red sauce than usual, and that the sauce seemed to be coming from the ceiling above my head until it suddenly hit me that it was steaming from my nose.
Call Me by Your Name
André Aciman
Spring is filling the air recently, the days are getting warmer and I've been setting up picnic blankets in the front yard during the past week - spending hours outside with my work computer and notes, soaking up the warmth. It may just be the stricter restrictions that the city has been living with in the past month, but the urge to move to a tiny cottage with chickens, a vegetable garden and somewhere to pick wild mushrooms has been rising a lot.
As picturesque as the above could be, I would miss the streets of Melbourne immeasurably I am sure. I'm contenting myself with ordering seeds and herbs from stores, planting an array of vegetables in pots and containers that line the kitchen table.

I picked up Call Me by Your Name again recently, someone at work mentioned wanting to read more so we've begun a tiny book club, something to keep him more accountable of having reading goals. The first on his list was Call Me by Your Name - the perfect excuse to do a re-read. There is no better time to read this book than spring I think - the words within the pages make me want to spend a spring and summer in Italy, picking fruit from trees and running barefoot around the grass. I'll have to make do with the flourless chocolate cake and raspberry coulis below, a dense, incredible cake that honestly took so many tries to get right. Most flourless chocolate cake recipes require 4 - 8 eggs, and the vegan versions I found had avocado, silken tofu and other substitutes that just don't sound that appealing. Chickpea flour worked a treat though - keeping the dense texture of the cake, but ensuring that it would not fall apart.
*Note: this recipe needs a strong binder since it's flourless - chickpea flour works quite well. But if you do eat eggs, you can remove the chickpea flour and instead replace it with 4 eggs.
Chocolate Cake and Raspberry Coulis
Ingredients
Cake
200g almond meal
2 tbsp cocoa, sifted
150g caster sugar
100ml milk
1 tbsp apple cider vinegar
1 tsp bi-carb soda
9 tbsp chickpea flour *see note
9 tbsp water
1 tsp vanilla extract
200g butter
180g dark chocolate, chopped
30 ml coffee liquor or coffee
Raspberry Coulis
150g raspberries, if using frozen leave the water out of the recipe
60g caster sugar
30ml water
Juice of one lemon
Cake
Preheat your oven to 160C and prepare a springform tin, grease it well and layer with baking paper.
Combine the chickpea flour and water together, stir well. It should become quite thick - you don't want it too watery. Put it to the side for now.
Combine the butter, dark chocolate, cocoa and coffee or coffee liquor in a sauce pan and heat on a medium heat. Stir as it melts so it all becomes combined into a smooth mixture and add in the vanilla. Put to the side to cool.
Mix the apple cider vinegar and milk together and place to the side to let it curdle into buttermilk.
Combine the almond meal, bi-carb and sugar together in a large bowl and add in the melted chocolate mixture, the chickpea and water mix, and the buttermilk. Stir well - you don't want lumps of the chickpea mix to remain solid in the batter.
Pour the batter into the prepared tin and bake for 60 - 70 minutes. Check on it frequently - if you're not using eggs, under baking this cake runs the risk of it collapsing and not holding together properly.
Test to see if it's ready by inserting a skewer, if wet batter comes out it's not done. When it has cooked, let it cool completely before removing from the pan.
Coulis
Combine all the ingredients into a saucepan and heat over a low heat. Cook for around 10 - 20 minutes or until the raspberries begin to mush together into a sauce and the sugar has dissolved.
Once done, cool in the fridge and it will thicken. I like my sauce with the seeds and whatnot in it, but you can strain it out if you want a smooth sauce.
Serve with the cake and enjoy!
Pâté | The Camomile Lawn
True, he stayed out most days until after dark, but he always came back in time for tea at five and stayed in from then on to talk to her, if she would listen, to Max, if he was home, and tirelessly to Max's musical friends, who frequently stayed to supper, samples the pâtés, compotes and cooked meats with fresh vegetables with which Monika stuffed into the hampers.The Camomile LawnMary Wesley
True, he stayed out most days until after dark, but he always came back in time for tea at five and stayed in from then on to talk to her, if she would listen, to Max, if he was home, and tirelessly to Max's musical friends, who frequently stayed to supper, samples the pâtés, compotes and cooked meats with fresh vegetables with which Monika stuffed into the hampers.
The Camomile Lawn
Mary Wesley
My city may be on lockdown but I'm still going to do it in style. And by in style, I mean by eating an entire cheeseboard and drinking excess amounts of bubbly wine. This entries recipe comes from The Camomile Lawn, a beguiling look into the lives of closely connected individuals before and during WW2. I've had this book on my shelf for many months before I finally picked it up to read, and I'm quite glad I did. I've read it more than twice already now since the start of this year - working the characters words and expressions into my mind to think back on.

I'm sure that their meals during WW2 weren't exactly made up of enormous cheese boards covered in fruit and a range of (vegan) speciality cheeses, but oh well. It likely wasn't a mushroom based pâté either - and while I have faint memories of eating actual pate when young and not hating it - these days my tastes run much towards the non-animal based alternatives to classic foods such as these ones. The mushroom is fantastic in it - it has an almost meaty texture and flavour, especially when cooked with the rest of the delicious ingredients.
Pâté
Ingredients
300g oyster mushrooms, roughly chopped
200g button mushrooms, roughly chopped
1 tbsp olive oil
2 tbsp beef stock + extra if needed
2 tbsp + 1 tbsp butter
1 bay leaf
2 cloves of garlic, thinly sliced
2 shallots, thinly sliced
20g walnuts, crushed
2 sprigs of fresh thyme
30ml tsp sherry
Sea salt
Fresh cracked pepper
Melt 1 tbsp of butter in a pan on medium heat - once melted add in the mushrooms and thyme and cook until they begin browning. Add a little salt and pepper at this stage, cook for another few minutes and then remove from the heat and place to the side.
Add another tbsp of butter to the pan and add in the shallots, cook until caramelised - around 5 minutes, then add in the walnuts and the garlic, cook for another few minutes before adding the mushrooms back into the pan, along with the beef stock and bay leaf.
Leave it lightly simmering in the pan until the liquid reduces down and then transfer to a blender or food processor, remembering to remove the bay leaf and any stems from the thyme. Deglaze the pan with the sherry, cook for a couple of minutes before adding it along with the olive oil into the blender or food processor with the rest of the ingredients.
In a pan melt the remaining tbsp of butter and place to the side to cool.
Season the mixture well with salt and pepper before blending until it is smooth. You can add a little more sherry or oil in during this time if it's too thick to blend properly.
Fill a ramekin or container to nearly the top (depending on the size of your container you may have enough for two!), and pour the melted butter on top to seal it.
Place into the fridge for at least a few hours to firm up and then enjoy with a cheeseboard, on a sandwich - or spooned directly from the jar.
Madeleines | The Essex Serpent
Charles commanded an awestruck girl in a white apron to bring at least a dozen of the cakes she personally liked best, and a gallon of tea. She evidently favoured coconut: there were macaroons, and speckled shortbread, and lozenges of cake doused in raspberry jam and rolled in coconut flakes. Cora, who'd walked several miles that morning, placidly ate her way towards a centrepiece of madeleines.The Essex SerpentSarah Perry
Charles commanded an awestruck girl in a white apron to bring at least a dozen of the cakes she personally liked best, and a gallon of tea. She evidently favoured coconut: there were macaroons, and speckled shortbread, and lozenges of cake doused in raspberry jam and rolled in coconut flakes. Cora, who'd walked several miles that morning, placidly ate her way towards a centrepiece of madeleines.
The Essex Serpent
Sarah Perry
I think Melbourne going into much stricter restrictions recently has driven my reading habits much more towards that of the Victoria era. I've been rushing through numerous Jane Austen's and Brontes', savouring the descriptions of the dreary moors or the spring time in country sides that seem very out of reach to myself at the moment.
The Essex Serpent was a great addition to add to the wistful dreaming. A town by the ocean, with numerous occupants and an overarching mystery of the serpent that hunts them, mixed in with a wistful romance and longing from afar? Perfect.
When I am finally allowed to take in the outside again, and spend more than just an allotted hour getting exercise, I have numerous plans of how I will spend my days. Trips to local museums, picnics in parks and a visit to the coast. The below recipe of madeleines is bound to make an appearance in many of the upcoming picnics.
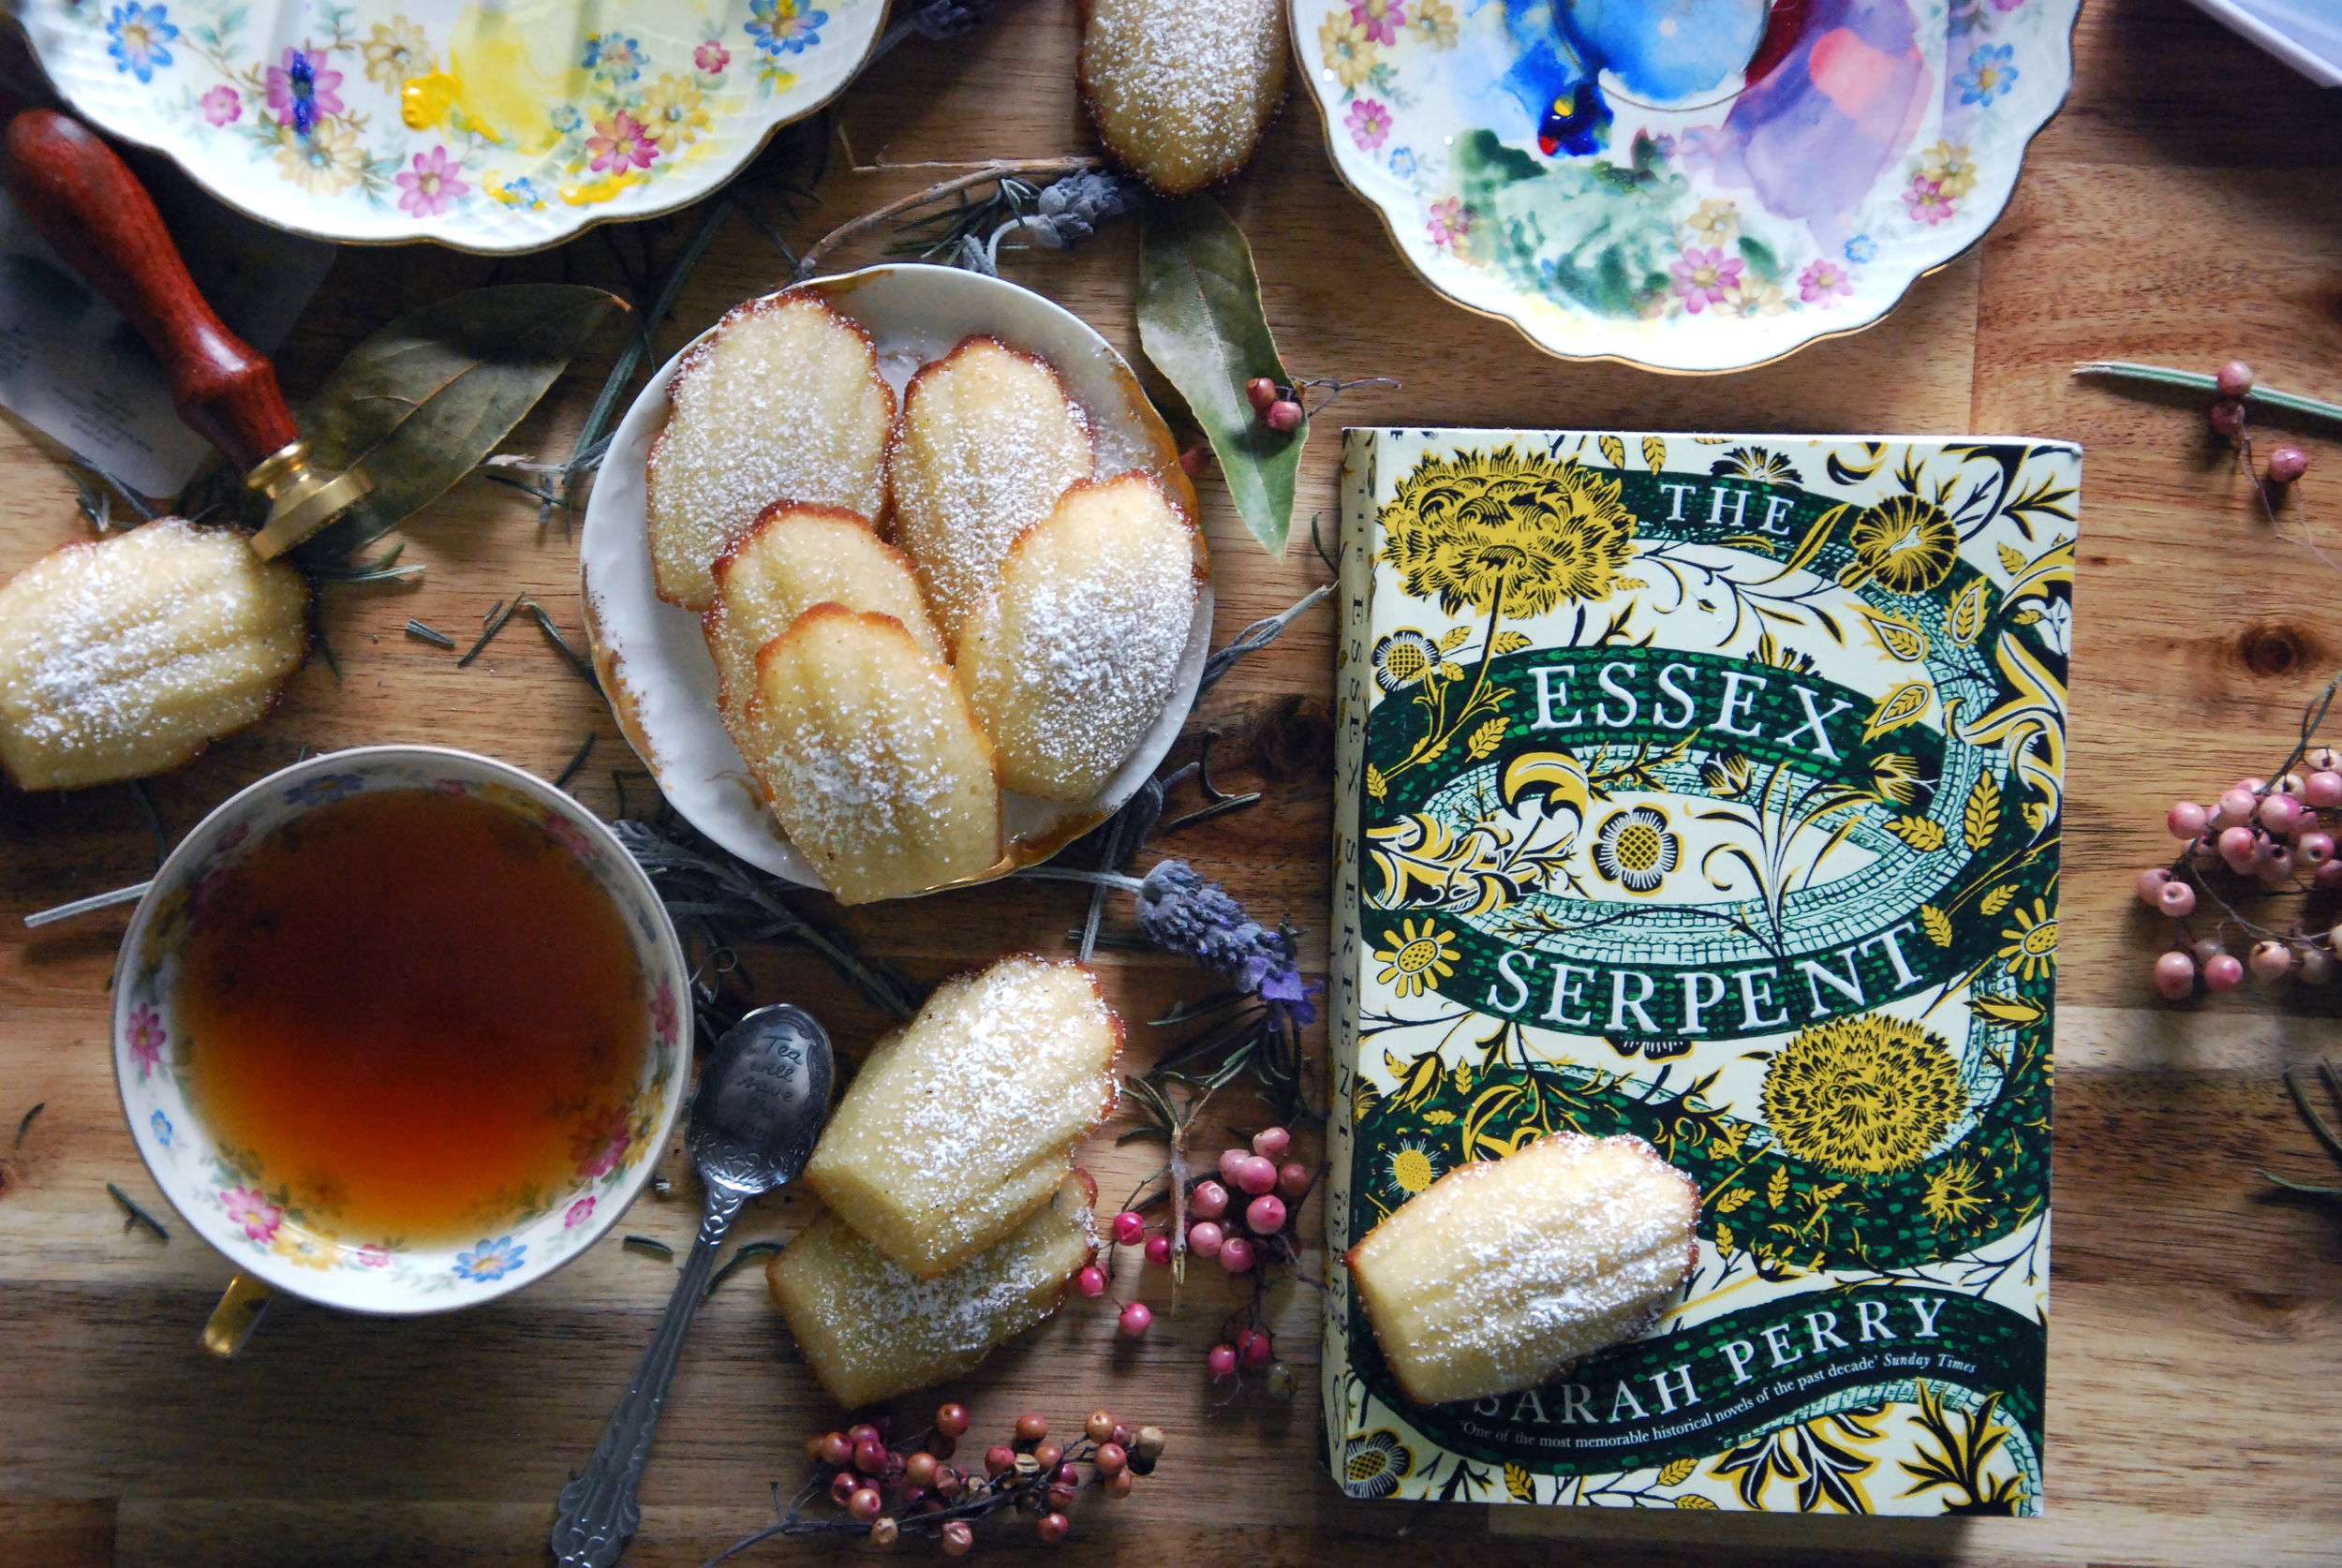
Years ago, I worked at a small cafe that made all their cakes and pastries from scratch in the kitchen, I have memories of serving up delicate madeleines on floral china with cups of tea, wondering what the appeal in the tiny cakes was exactly. Now having made them - I get it. They're so good. I think my household cleared the two batches I made in one weekend within a few hours, inhaling one after another with alternating cups of tea and coffee.
*Note: aquafaba is the liquid from a can of chickpeas - it's a good replacement for egg whites. I've made this recipe with and without it - and honestly it's fine without it as well, they still turned out great. But adding it in does make the mixture more airy and light.
Madeleines
Makes approx 18 - 20
Ingredients
120g butter, melted and at room temp
1 tbsp aquafaba *see note
100g caster sugar
90ml milk
1 lemon, zested and juiced
1 tsp vanilla extract
135g plain flour, sifted
1 tsp bi-carb soda
Sea salt
Icing sugar, to garnish after baking
Combine the juice of the lemon and the milk together, mix and let sit for around 5 minutes or until it curdles.
In the bowl of stand mixer (or if you have very strong arms and a good whisk, any bowl you want) combine the sugar, aquafaba and curdled milk, beat for around 8 - 10 minutes until well combined. Add in the vanilla extract and the lemon zest and mix till combined.
Remove from the mixer ad gently fold in the sifted flour, bi-carb soda and salt. Do it bit by bit, so the mixture stays slightly fluffy.
Slowly pour in the melted butter, it will take a bit to work it into the mixture but once you have it should be thick and shiny. Place the batter into the fridge for about half an hour.
Five minutes before the batter comes out of the fridge preheat your oven to 180C and prepare your madeleine tray/s, greasing with a little extra melted butter.
The batter from the fridge should be slightly sponge like, leave it like this and do not mix it. Use a table spoon to place a scoop of the mixture into each of the moulds on the tray, don't worry about smoothing it out - it will do so in the oven.
Bake for around 10 - 15 minutes, checking on them every few minutes. The edges should be slightly more browned than the middle but if you leave them too long the edges will burn and become quite crunchy.
When they're ready, remove them from the oven and turn the tray out onto a cooling rack - the madeleines should fall out easily.
Dust with icing sugar and enjoy with a coffee or cup of tea!
Spaghetti and Meatballs | Brooklyn
Over the previous weekend, Eilis had received instructions from Diana about how to eat spaghetti properly using a fork only, but what was served was not as thin and slippery as the spaghetti Diana had made for her. The sauce was just as red, but was filled with flavours that she had never sampled before.BrooklynColm Tóibín
Over the previous weekend, Eilis had received instructions from Diana about how to eat spaghetti properly using a fork only, but what was served was not as thin and slippery as the spaghetti Diana had made for her. The sauce was just as red, but was filled with flavours that she had never sampled before.
Brooklyn
Colm Tóibín
Autumn has rushed through Melbourne in a hurry and the cold chill of winter has begun to set in. For me this means a hot water bottle every night, excuses to go for a walk in the rain, re-reading classics and an array of carb-heavy comfort foods.
One such classic was Brooklyn from Colm Tóibín, a book I pick up after every rewatch of the film - something that also happens quite a bit. An amazing book about the perils of being homesick, creating a family in another country and a fascinating look at the toxicity that can emerge in small communities.
While there is an array of Irish foods sprinkled throughout this book, I of course had to make some spaghetti and meatballs, inspired by the first meal Eilis shares with Tony's family, one in which she had to practice eating spaghetti beforehand.

My last foray into meatball making was a good six years ago - the only memories I have from it are awful unfortunately. I think the meat may have been old and despite taking only a single bite, I experienced absolutely dreadful food poisoning that lasted throughout New Years Eve and the next day. An experience like that will absolutely turn you away from the food. Only recently I felt inspired to give them another go - albeit with plant based mince and a much lower chance of possible food poisoning.
The end result was a fantastic hearty meal - with a sharp red sauce (that can easily be made in advance and bottled!). Add in some fresh basil and cheese and you really can't go wrong.
*Note: I used Funky Fields plant based mince for my meatballs. I would do a combination of pork and beef mince if using real mince. The sauce as well needs to cook for a good hour or so - so make sure you get started on that earlier, it keeps really well also, so can be made quite a bit in advance.
Spaghetti and Meatballs
Approx. 5 servings
Ingredients
Meatballs
400g minced meat *see note
2 tbsp plain yoghurt
1/4 cup parmesan cheese
3 cloves garlic, minced
1 cup of fine breadcrumbs
2 tbsp tomato paste
1 1/2 tsp dried basil3
tbsp olive oil
Pinch sea salt
Fresh pepper
Sauce *see note
800g tinned peeled tomatoes
400g tinned diced tomatoes
2 brown onions, diced
5 cloves of garlic, roughly chopped
2 tsp dried oregano
2 tbsp olive oil
2 tsp dried chilli flakes
3 tbsp fresh basil
100ml red wine, optional
100ml water
Sea salt
Fresh pepper
350g spaghetti, my recipe is here if you want to make it yourself!
Sauce
In a large drying pan heat 2 tbsp of olive oil and cook the diced onions for around 2 minutes before adding in the roughly chopped garlic - cook for around 5 -6 minutes or until onion is translucent.
Add in the red wine, cooking it off for a few minutes before adding in all the tomatoes, oregano, chilli flakes, a good pinch of sea salt and pinch of pepper.
Leave the sauce on a medium heat until it starts to bubble, add in the 100ml of water and fresh basil and leave to continue cooking . You want to leave it on the stove for at least an hour - but it can easily be left for a good four hours or so - the flavours will only grow.
Meatballs
Add all the ingredients for the meatballs into a large bowl, except for the olive oil. Combine well, using your hands to mix the ingredients in - you don't want to bite down on a chunk of anything.
Shape the mince mixture into balls - whatever size you want!
Heat the leftover olive oil in a pan until hot and place the meatballs in - turning occasionally until all are browned and cooked.
At this stage you want to have a large pot of water on the stove boiling - make sure that you liberally salt the water as well. Cook the spaghetti according to instructions and drain when ready.
Divide the meatballs and sauce with the cooked spaghetti, serve with fresh basil and parmesan.
Char Siu Bao | The Surprising Power of a Good Dumpling
I'm speechless again for the second time in as many minutes. A part of me is terrified. But another part of my brain is running wild with the possibilities. Maybe we could make Xiao Long Bao or BBQ pork buns. A yum cha style takeaway? For dinner!
I'm speechless again for the second time in as many minutes. A part of me is terrified. But another part of my brain is running wild with the possibilities. Maybe we could make Xiao Long Bao or BBQ pork buns. A yum cha style takeaway? For dinner!
The Surprising Power of a Good Dumpling
Wai Chim
I experienced my first ever yum cha recently. Visiting Sydney for the Mardi Gras parade, I remembered that there was an all vegan yum cha venue - something that is sorely lacking from Melbourne, but possibly for the best considering I spent over $100 within the first thirty minutes, eager to taste everything that got brought past our table. The small town I grew up in had no such options, vegan or otherwise, within it - there was a Chinese buffet from memory, but by most reports from high school friends, eating there would result in a bout of food poisoning unfortunately.
My favourite item (aside from dumplings, because obviously) was probably the steamed buns - hugely fluffy and light, with perfectly cooked and seasoned faux pork inside. Usually I would try and source a plant-based pork to make this with, to ensure that it was as close to the book mention as possible. Unfortunately with everything happening related to COVID-19, it's been harder to make trips out to the usual store that sells the majority of faux meat I buy. I made this recipe twice - once with brined jackfruit and once with mushrooms. While jackfruit will get you closer to the correct texture of pork, I found it was a bit too sweet for me. The mushrooms however absorbed the sauce instantly, providing a flavour that was not too sweet and not too overpowering.

I've read through The Surprising Power of a Good Dumpling a few time - it was a purchase made on a whim when browsing Readings bookstore near Cinema Nova (something made very dangerous by it being open till 11pm - the perfect time for browsing as a movie gets out). While definitely located within the young adult genre, it is still a well done book about the challenges of growing up with immigrant parents, along with an even deeper look into the shame of mental health in some cultures. Definitely worth a read at some stage.
Char Siu Bao
Makes approx. 15 buns
IngredientsDough
1 tsp instant yeast
180ml warm water
2 tbsp sugar
1/4 vegetable oil
2 1/2 tsp baking power
Filling
250g king oyster mushrooms, diced very small
1 brown onion, finely diced
3 - 4 cloves of garlic, minced
2 tbsp tamari/soy sauce
1 tbsp rice wine vinegar
2 tbsp hoisin sauce
1 tsp sugar
1 tbsp vegetable oil
1 tbsp fresh ginger, minced
1/4 tsp Chinese five spice
1 tbsp cornflour
2 tbsp water
Combine the warm water and yeast, leaving to sit for around five minutes or until the mixture turns a bit foamy.
Add in the flour, sugar, oil and mix until a soft dough forms.
On a gently floured surfaced, knead the dough until it becomes smooth and elastic. You may need to add a little more flour at this point or water - you don't want the dough to be too dry or too sticky. Place into an oiled bowl, cover with a clean tea towel and leave for around 45 minutes to rest.
During this time, make the filling. Combine the rice wine vinegar, tamari or soy sauce, sugar, hoisin sauce, ginger, minced garlic and Chinese 5 spice and place to the side.
Heat the vegetable oil in a pan and cook the finely diced garlic until soft before adding in the diced mushrooms. You want to cook them for around 5 - 10 minutes until the moisture cooks out of the mushrooms.
Add in the prepared sauce to the pan, mixing with the cooked mushrooms and onion until they are all well covered. Combine the 2 tbsp water and 1 tbsp cornflour until a slurry mix and add into the pan. It will only take a minute or so for the mixture to thicken - make sure you keep moving it during this time otherwise it will congeal.
Remove from the heat and place to the side to cool.
Back to the dough! Pull the dough out onto a lightly floured surface again, lightly pushing down to get the air from it. Now is when you want to add the baking powder in, folding it into the dough until it is combined.
Divide the dough into 15 equal pieces (you can do more or less at this stage depending how big you want the buns to be), rolling each piece into a circle.
Prepare a number of circles cut from baking paper - you want enough to match however many buns you're making.
Cup the circle of flattened dough in your hand and place a spoonful of filling in the middle - sealing them is a bit tricky and I still haven't mastered it, I recommended looking up some tutorials on Youtube. Basically, you're wanting to sort of pleat the outside all the way around, pinching it off until it's closed.
While doing this, get a pot of water on to boil - I always use a bamboo steamer to help avoid things sticking - but any steamer is fine. As you make the buns, place them into the steamer on one of the baking paper circles. They'll take around 5 - 8 minutes to cook through depending on how hot the water is. Once you've had one it's a good indication of cooking time.
Enjoy with tamari, chilli or vinegar!
Naan Bread | White Teeth
'But what helps eith the heat, Ravind? What will aid the gentleman with the burning sensation he is presently feeling?''More rice, Ardashir.''And? And?'Ravind looked stumped and egan to sweat, Samad, who had been belittled bu Ardashir too many times to enjoy watching someone else play the victim, leant over to whisper the answer in Ravind's clammy ear.Ravind's face lit up in gratitude. 'More naan bread, Ardashir!'
'But what helps with the heat, Ravind? What will aid the gentleman with the burning sensation he is presently feeling?'
’More rice, Ardashir.'
'And? And?'
Ravind looked stumped and began to sweat, Samad, who had been belittled by Ardashir too many times to enjoy watching someone else play the victim, leant over to whisper the answer in Ravind's clammy ear.
Ravind's face lit up in gratitude.'More naan bread, Ardashir!'
White Teeth
Zadie Smith
So the world's going a bit crazy. Unfortunately in Australia we have also been affected, with cases growing in Melbourne very rapidly. It's amazing to see how the entire city has been affected, with trains and trams going empty, restaurants and cafes throughout the CBD bare and more and more companies bringing in mandatory work from home policies. Unfortunately, the hoarding mentality that many have adopted has also hit the supermarkets near me and being able to purchase flour (I just want to make cakes, people!) has been tricky.
I was able however, to get some Tipo00 flour so don't be surprised by the increase in bread related recipes coming up. White Teeth had been sitting in my shelf for the past six years, many friends of mine spoke of it as their assigned reading in high school - but I somehow had never come across it or even heard of it. I finally pulled it off the shelf around a week ago and practically inhaled the words. I think I finished it within the space of four days, taking every opportunity to sneak a few pages of reading in - desperate to know what was going to happen next. On that note - I do not recommend attempting to read while crossing train platforms on your way to work, you'll crash into people and they'll be super annoyed. Trust me.

There are numerous dishes mentioned throughout this book I want to eventually try (Jamaican dumplings, anyone?) but my attention was very firmly fixed upon an attempt at naan bread. Unfortunately, it's near impossible to find naan bread at any market that doesn't contain dairy and since going plant based I've had to miss out on it. I had a few attempts at this recipe - and unfortunately as I do not possess a cast iron pan, I don't believe I will ever get the perfect cook to them. However, using a non stick pan still resulted in delicious, fluffy naan breads - a perfect accompaniment to a meal.
*Note: You can use any plain yoghurt for this - I went with coconut though because it's just so delightfully tangy.
Naan Bread
Makes approx. 8
Ingredients
2 cups plain flour + 1 tbsp
2 tsp sugar
1 tsp instant yeast
1 1/2 tsp salt
3 tbsp extra virgin olive oil
3/4 cup lukewarm water
3 tbsp coconut yoghurt, *see note
3 tbsp butter, melted
3 cloves roasted garlic
Roughly chopped parsley, to garnish
In a largish bowl mix together the flour, salt, sugar and yeast.
In a seperate bowl, combine the yoghurt, olive oil and warm water. Add to the mixed dry ingredients and combine - once the dough has started coming together, bring it onto a lightly floured surface and knead gently until the dough is soft and slightly sticky.
Put back into a clean, lightly oiled bowl, cover with cling wrap or a clean tea towel and leave in a warm place for an hour or until the dough has doubled in size.
Bring your risen dough out onto a lightly floured surface and shape into a sort of log, cut it into 8 equal pieces. If the pieces are quite sticky still, dust a little of the extra flour on it to stop it sticking.
Roll out each individual piece of dough into an oval shape, ensuring that it's no more than a cm thick (I made this mistake when making it for the first time and they sadly ended up quite doughy).
Bring a cast iron pan (if you have one!) to a very hot heat slowly. Remove any excess flour from the uncooked naan breads by tossing them between your hands lightly before placing them in the pan.
As they are cooking, air bubbles should appear on top - after about two minutes flip the naan breads so that the other side can cook for another two minutes. They should ideally be golden brown with dark spots where the air bubbles have appeared.
To keep the naan breads warm while each one is cooking, pop them into an oven proof dish and place into the oven at a low heat.
Remove the skins from the roasted garlic and crush into the melted butter, combining well.
When you're ready to eat, use a pastry brush to liberally spread the garlic butter mix onto each naan bread before sprinkling with the chopped parley to serve. Enjoy!