Madeleines | The Essex Serpent
Charles commanded an awestruck girl in a white apron to bring at least a dozen of the cakes she personally liked best, and a gallon of tea. She evidently favoured coconut: there were macaroons, and speckled shortbread, and lozenges of cake doused in raspberry jam and rolled in coconut flakes. Cora, who'd walked several miles that morning, placidly ate her way towards a centrepiece of madeleines.The Essex SerpentSarah Perry
Charles commanded an awestruck girl in a white apron to bring at least a dozen of the cakes she personally liked best, and a gallon of tea. She evidently favoured coconut: there were macaroons, and speckled shortbread, and lozenges of cake doused in raspberry jam and rolled in coconut flakes. Cora, who'd walked several miles that morning, placidly ate her way towards a centrepiece of madeleines.
The Essex Serpent
Sarah Perry
I think Melbourne going into much stricter restrictions recently has driven my reading habits much more towards that of the Victoria era. I've been rushing through numerous Jane Austen's and Brontes', savouring the descriptions of the dreary moors or the spring time in country sides that seem very out of reach to myself at the moment.
The Essex Serpent was a great addition to add to the wistful dreaming. A town by the ocean, with numerous occupants and an overarching mystery of the serpent that hunts them, mixed in with a wistful romance and longing from afar? Perfect.
When I am finally allowed to take in the outside again, and spend more than just an allotted hour getting exercise, I have numerous plans of how I will spend my days. Trips to local museums, picnics in parks and a visit to the coast. The below recipe of madeleines is bound to make an appearance in many of the upcoming picnics.
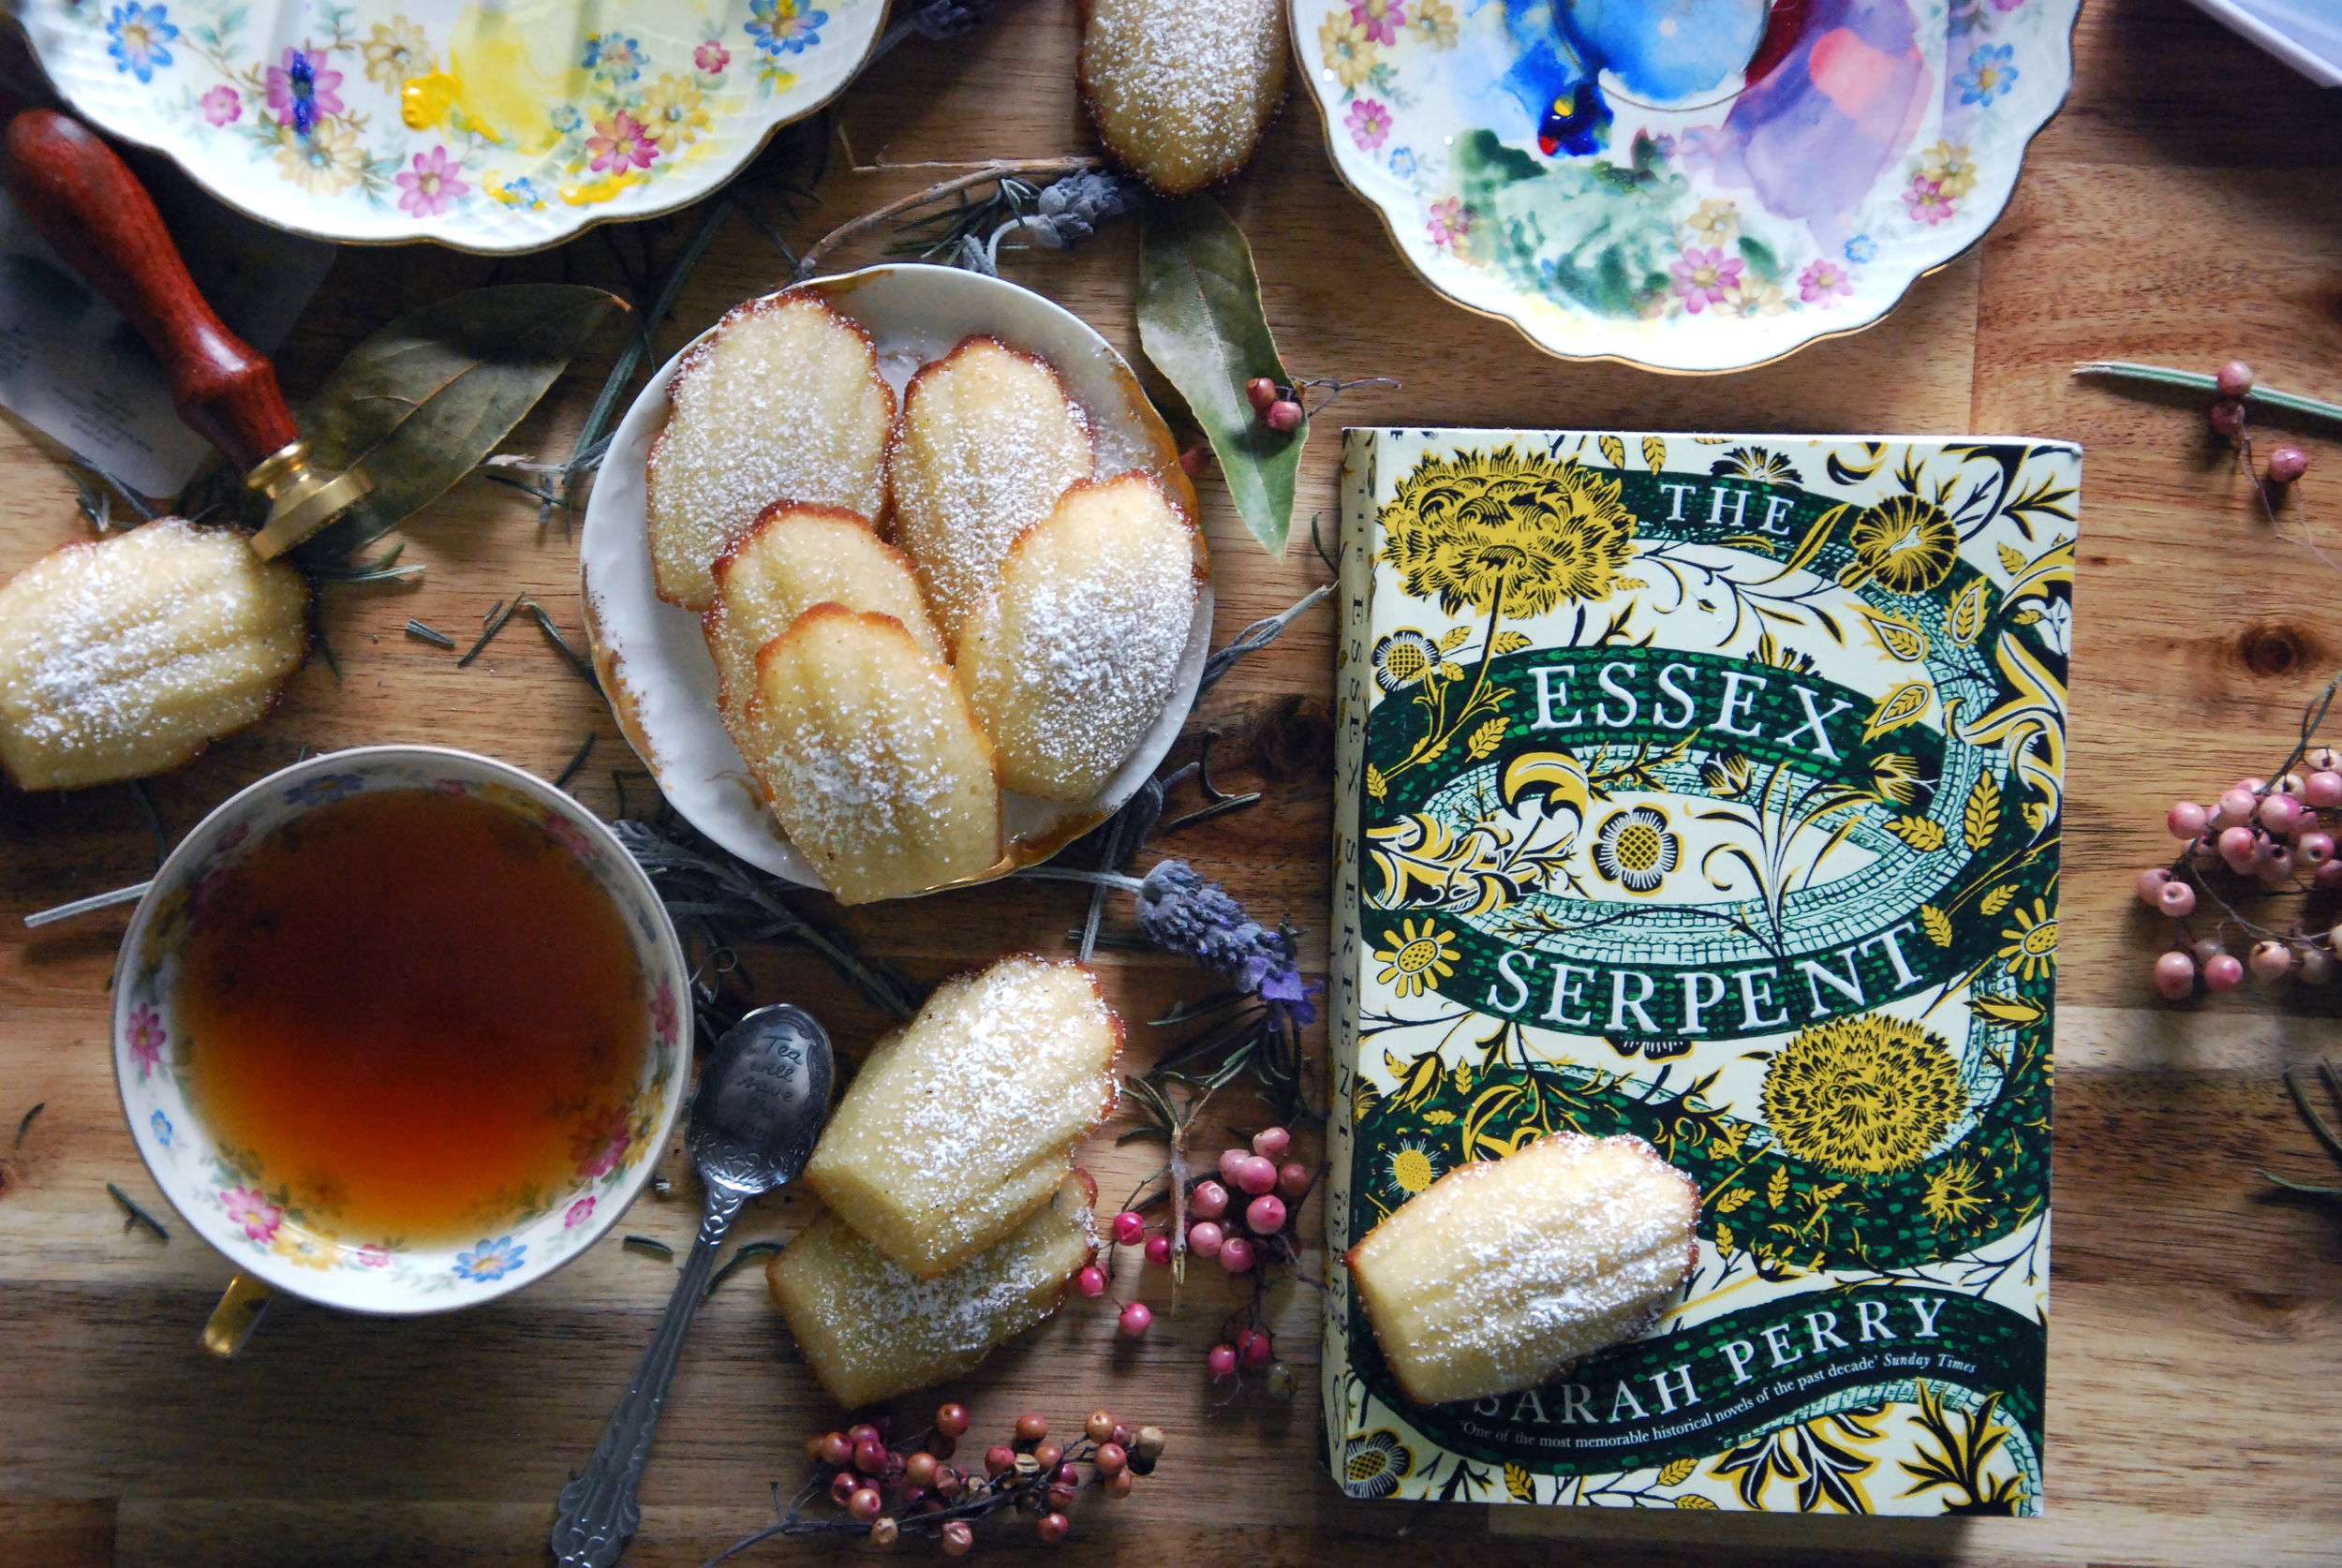
Years ago, I worked at a small cafe that made all their cakes and pastries from scratch in the kitchen, I have memories of serving up delicate madeleines on floral china with cups of tea, wondering what the appeal in the tiny cakes was exactly. Now having made them - I get it. They're so good. I think my household cleared the two batches I made in one weekend within a few hours, inhaling one after another with alternating cups of tea and coffee.
*Note: aquafaba is the liquid from a can of chickpeas - it's a good replacement for egg whites. I've made this recipe with and without it - and honestly it's fine without it as well, they still turned out great. But adding it in does make the mixture more airy and light.
Madeleines
Makes approx 18 - 20
Ingredients
120g butter, melted and at room temp
1 tbsp aquafaba *see note
100g caster sugar
90ml milk
1 lemon, zested and juiced
1 tsp vanilla extract
135g plain flour, sifted
1 tsp bi-carb soda
Sea salt
Icing sugar, to garnish after baking
Combine the juice of the lemon and the milk together, mix and let sit for around 5 minutes or until it curdles.
In the bowl of stand mixer (or if you have very strong arms and a good whisk, any bowl you want) combine the sugar, aquafaba and curdled milk, beat for around 8 - 10 minutes until well combined. Add in the vanilla extract and the lemon zest and mix till combined.
Remove from the mixer ad gently fold in the sifted flour, bi-carb soda and salt. Do it bit by bit, so the mixture stays slightly fluffy.
Slowly pour in the melted butter, it will take a bit to work it into the mixture but once you have it should be thick and shiny. Place the batter into the fridge for about half an hour.
Five minutes before the batter comes out of the fridge preheat your oven to 180C and prepare your madeleine tray/s, greasing with a little extra melted butter.
The batter from the fridge should be slightly sponge like, leave it like this and do not mix it. Use a table spoon to place a scoop of the mixture into each of the moulds on the tray, don't worry about smoothing it out - it will do so in the oven.
Bake for around 10 - 15 minutes, checking on them every few minutes. The edges should be slightly more browned than the middle but if you leave them too long the edges will burn and become quite crunchy.
When they're ready, remove them from the oven and turn the tray out onto a cooling rack - the madeleines should fall out easily.
Dust with icing sugar and enjoy with a coffee or cup of tea!
Anzac Biscuits | The Third Day, the Frost
She was so good in the kitchen that she intimidated me a bit; I kept to the simplest cooking: scrambled eggs, lamb chops, pasta, Anzac biscuits.The Third Day, the FrostJohn Marsden
She was so good in the kitchen that she intimidated me a bit; I kept to the simplest cooking: scrambled eggs, lamb chops, pasta, Anzac biscuits.
The Third Day, the Frost
John Marsden
The Tomorrow, when the War Began series was a life changing one for myself when growing - and for most Australian's around my age group most likely. It was my first exposure to the now popular YA dystopian genre, where a group of young teenagers are forced to defend themselves and their country against invaders. Growing up in the middle of the countryside probably also helped me connect to the story itself - memories of camping on all holidays (before I came to the conclusion that camping was not for me, though maybe it is a trait of getting older, I would quite like a short camping trip now and then).
I had the joy in my teenage years of attending John Marsden's, the author of the Tomorrow series, writing camp. Spending a week on his bush property learning to write while exploring the areas that clearly influenced him when penning his own work. It was lovely, and the memories of it were probably what prompted me to pick the series up again last year, thankfully my housemate had the books I was missing from my collection and I was able to finish all within a few weeks.

Outside of the classics I read when quite young, Peter Rabbit or Winnie the Pooh, I don't think any other book has given me such clear nostalgia. Of course, no Australian penned book would be complete without mention of Anzac biscuits, a classic in the early months of the year, or really - any time of the year. I did actually make these around the Anzac day weekend, realising that I had all the necessary ingredients in my cupboard at the time. I'd forgotten just how delicious they were with a cup of tea.
Anzac Biscuits
Makes approx. 15
Ingredients
150g plain flour
100g rolled oats
80g desiccated coconut
90g brown sugar
60g raw caster sugar
135g butter
3 tbsp golden syrup
1/2 tsp bicarb soda
2 tbsp water
Preheat the oven to 160C and line two baking sheets with baking paper.
Combine the flour, oats, coconut and both sugars together in a medium bowl.
Heat the butter, golden syrup and water together on a medium heat, until the butter melts and the mixture is smooth. Stir in the bicarb soda (it'll froth up a little) and add into the oat mixture, stirring until well mixed.
Roll spoonfuls of the mixture into balls, placing them onto the baking trays - leaving about 5cms between them, pressing down on top of each ball to flatten them out. I tend to squish mine down quite a bit - I like them crispy and chewy - which does leave them a bit of a mess but still delicious!
Bake for around 10 - 12 minutes if you want them soft and chewy or 15 minutes if you prefer them crispy and crunchy. Leave to cool on the tray for about 15 minutes before transferring to a cooling rack. Enjoy!
Northern Lights | Olive Oil Gingerbread
"It was a mighty voice, a woman's voice, but a woman with lungs of brass and leather. Lyra looked around for her at once, because this was Ma Costa, who had clouted Lyra on two occasions but given her hot gingerbread on three."- Northern Lights, Phillip Pullman
It was a mighty voice, a woman's voice, but a woman with lungs of brass and leather. Lyra looked around for her at once, because this was Ma Costa, who had clouted Lyra on two occasions but given her hot gingerbread on three.
Northern Lights
Phillip Pullman
This gingerbread was made close to a month ago - created on a day spent babysitting and the realisation that making batches upon batches of cookies was the best way to entertain little ones. I think there was a particular thrill also, making gingerbread so close to Christmas, the spicy scent of it filling the air as it baked.
Like many I'm sure, I spent the later part of the previous year fixed very closely on the TV show of His Dark Materials. I loved it - the casting was superb and I love how firmly the book was followed. It even inspired me to pick up the books again, I had forgotten how incredible they were - I think I likely finished all three within the month.While the gingerbread made by Ma Costa likely wasn't cut into the shape of people, it was sure to have the strong flavours that this one is filled with. And like hers, this is best enjoyed hot from the oven with a cup of tea.
Olive Oil Gingerbread
Makes approx. 16
Ingredients
1/3 cup extra virgin olive oil
3/4 cup raw caster sugar
1/4 cup molasses
1/4 cup milk
2 cups plain flour + 1 tbsp for rolling out dough
1/2 tsp ground cinnamon
1/4 tsp ground nutmeg
1/4 tsp ground cloves
2 tsp ground ginger
1/2 tsp bi-carb soda
1/2 tsp baking powder
1/2 tsp sea salt
Whisk together the oil and sugar until well combined. Add in the molasses and milk, mixing together as best you can. The oil will be tricky to mix in, but just do the best you can.
Sift all dry ingredients together, adding in the combined wet ingredients. Mix until a stiff dough forms. Flatten the dough a little and wrap in cling wrap - chill for at least an hour.
Preheat oven to 180C, line two baking trays for baking paper and put to the side.
Lightly flour a large surface, roll out the chilled dough till it is around 1cm thick, use any cookie cutter (or even the rim of a glass works well, honestly) you want and cut out the shapes wanted. Bundle the cut off dough together and repeat until all the dough is used.
Using a thin spatula, or the edge of a butter knife, gently place the cut out gingerbread shapes onto the prepared trays. Bake for around 8 - 10 mins.
Leave the cookies to cool on the baking tray for at least 2 minutes, to allow them to harden slightly before transferring them to a wire tray to cool completely. Or do as Ma Coster does and serve them hot!
Spice Cookies | We Have Always Lived in the Castle
"In the morning Constance decided to make spice cookies for dinner; that was too bad, because if any of us had known we could have told her not to bother, that Thursday was going to be the last day. Even Uncle Julian did not suspect, however; he felt a little strong on Thursday morning and late in the morning Constance brought him into the kitchen which smell richly of spice cookies and he continued putting his papers into the box."- We Have Always Lived in the Castle, Shirley Jackson
In the morning Constance decided to make spice cookies for dinner; that was too bad, because if any of us had known we could have told her not to bother, that Thursday was going to be the last day. Even Uncle Julian did not suspect, however; he felt a little strong on Thursday morning and late in the morning Constance brought him into the kitchen which smell richly of spice cookies and he continued putting his papers into the box.
We Have Always Lived in the Castle
Shirley Jackson
I’m a few days late with my latest recipe post but I wanted to try and stretch this one out for Halloween. Halloween isn’t something that has been been hugely celebrated within Australia, but I’ve noticed in the last few years that more and more children seem to be on the street trick or treating, and I really can’t argue against children being cute in costumes. We handed out an array of lollies and icy poles last night as they came knocking, the frozen treat greatly appreciated by many in the hot weather.
I picked up Shirley Jackson’s We Have Always Lived in the Castle at random a few weeks ago, having finished the book I had on me over lunch and wanting another for the train back home. I ended up loving it. A gothic mystery story, the entirety of the book was filled with an array of descriptive foods and thoughts - described in a way that utterly captivated me. It was hard to choose exactly what food I wanted to explore from it (I may try my hand at Constance’s special rum cakes in the future), but ended up deciding on Spice Cookies.
Also, before we get to the recipe part. Yes these are quite burnt. My oven as always, is terrible for baking and there is no way to regulate temperature basically. I did do a second batch the next day and realised that I just needed to be shifting them around inside the oven and covering them with foil for a little bit. No need to do that yourselves, unless you also have an oven from the 70's (that they don't make parts for anymore - it's been missing a handle for three years) that is utterly terrible for baking of any sort. I will likely remake them again another day and do some nicer photographs but eh, this is kinda what happens sometimes.
These cookies are amazing, a gingerbready delight of spices, the perfect snack to have with a tea or hot chocolate. I took numerous batches to work and they all disappeared quite quickly. I sourced the recipe from here, but ended up changing around a few measurements and ingredients to better suit what I wanted.
Spice Cookies
Makes approx. 16
Ingredients
2 1/4 cup plain
2 1/2 tsp baking powder
2 tsp ground cinnamon
1 tsp ground nutmeg
2 tsp ground ginger
1 tsp ground cardamon
1/4 tsp sea salt
115g butter, melted
2/3 cup brown sugar
1/2 cup molasses
1/2 tsp vanilla extract
3 tbsp raw sugar, for rolling the cookies in
Preheat oven to 180C and prepare two baking trays with a layer of baking paper.
Combine plain flour, baking powder, all spices and salt together in a bowl and combine well.
In a seperate bowl, combine the melted butter with the brown sugar, vanilla and molasses.
Combine the wet ingredients with the dry and mix until combined, it should form a soft dough - if it feels too wet, add a touch more flour.
Cover and refrigerate for approx. 30 minutes.
Roll the cookie dough into balls (size is up to you, but try not to make them too giant) that are all roughly the same size, press the tops down into the raw sugar and flatten slightly.
Place the cookies onto the prepared trays and bake for 10 - 12 minutes, or until the cookies have expanded and are cracking on top slightly.
Leave on the tray to cool for at least five minutes before placing onto a cooling rack. Enjoy!