Mint Lemonade | The Wonderful Wizard of Oz
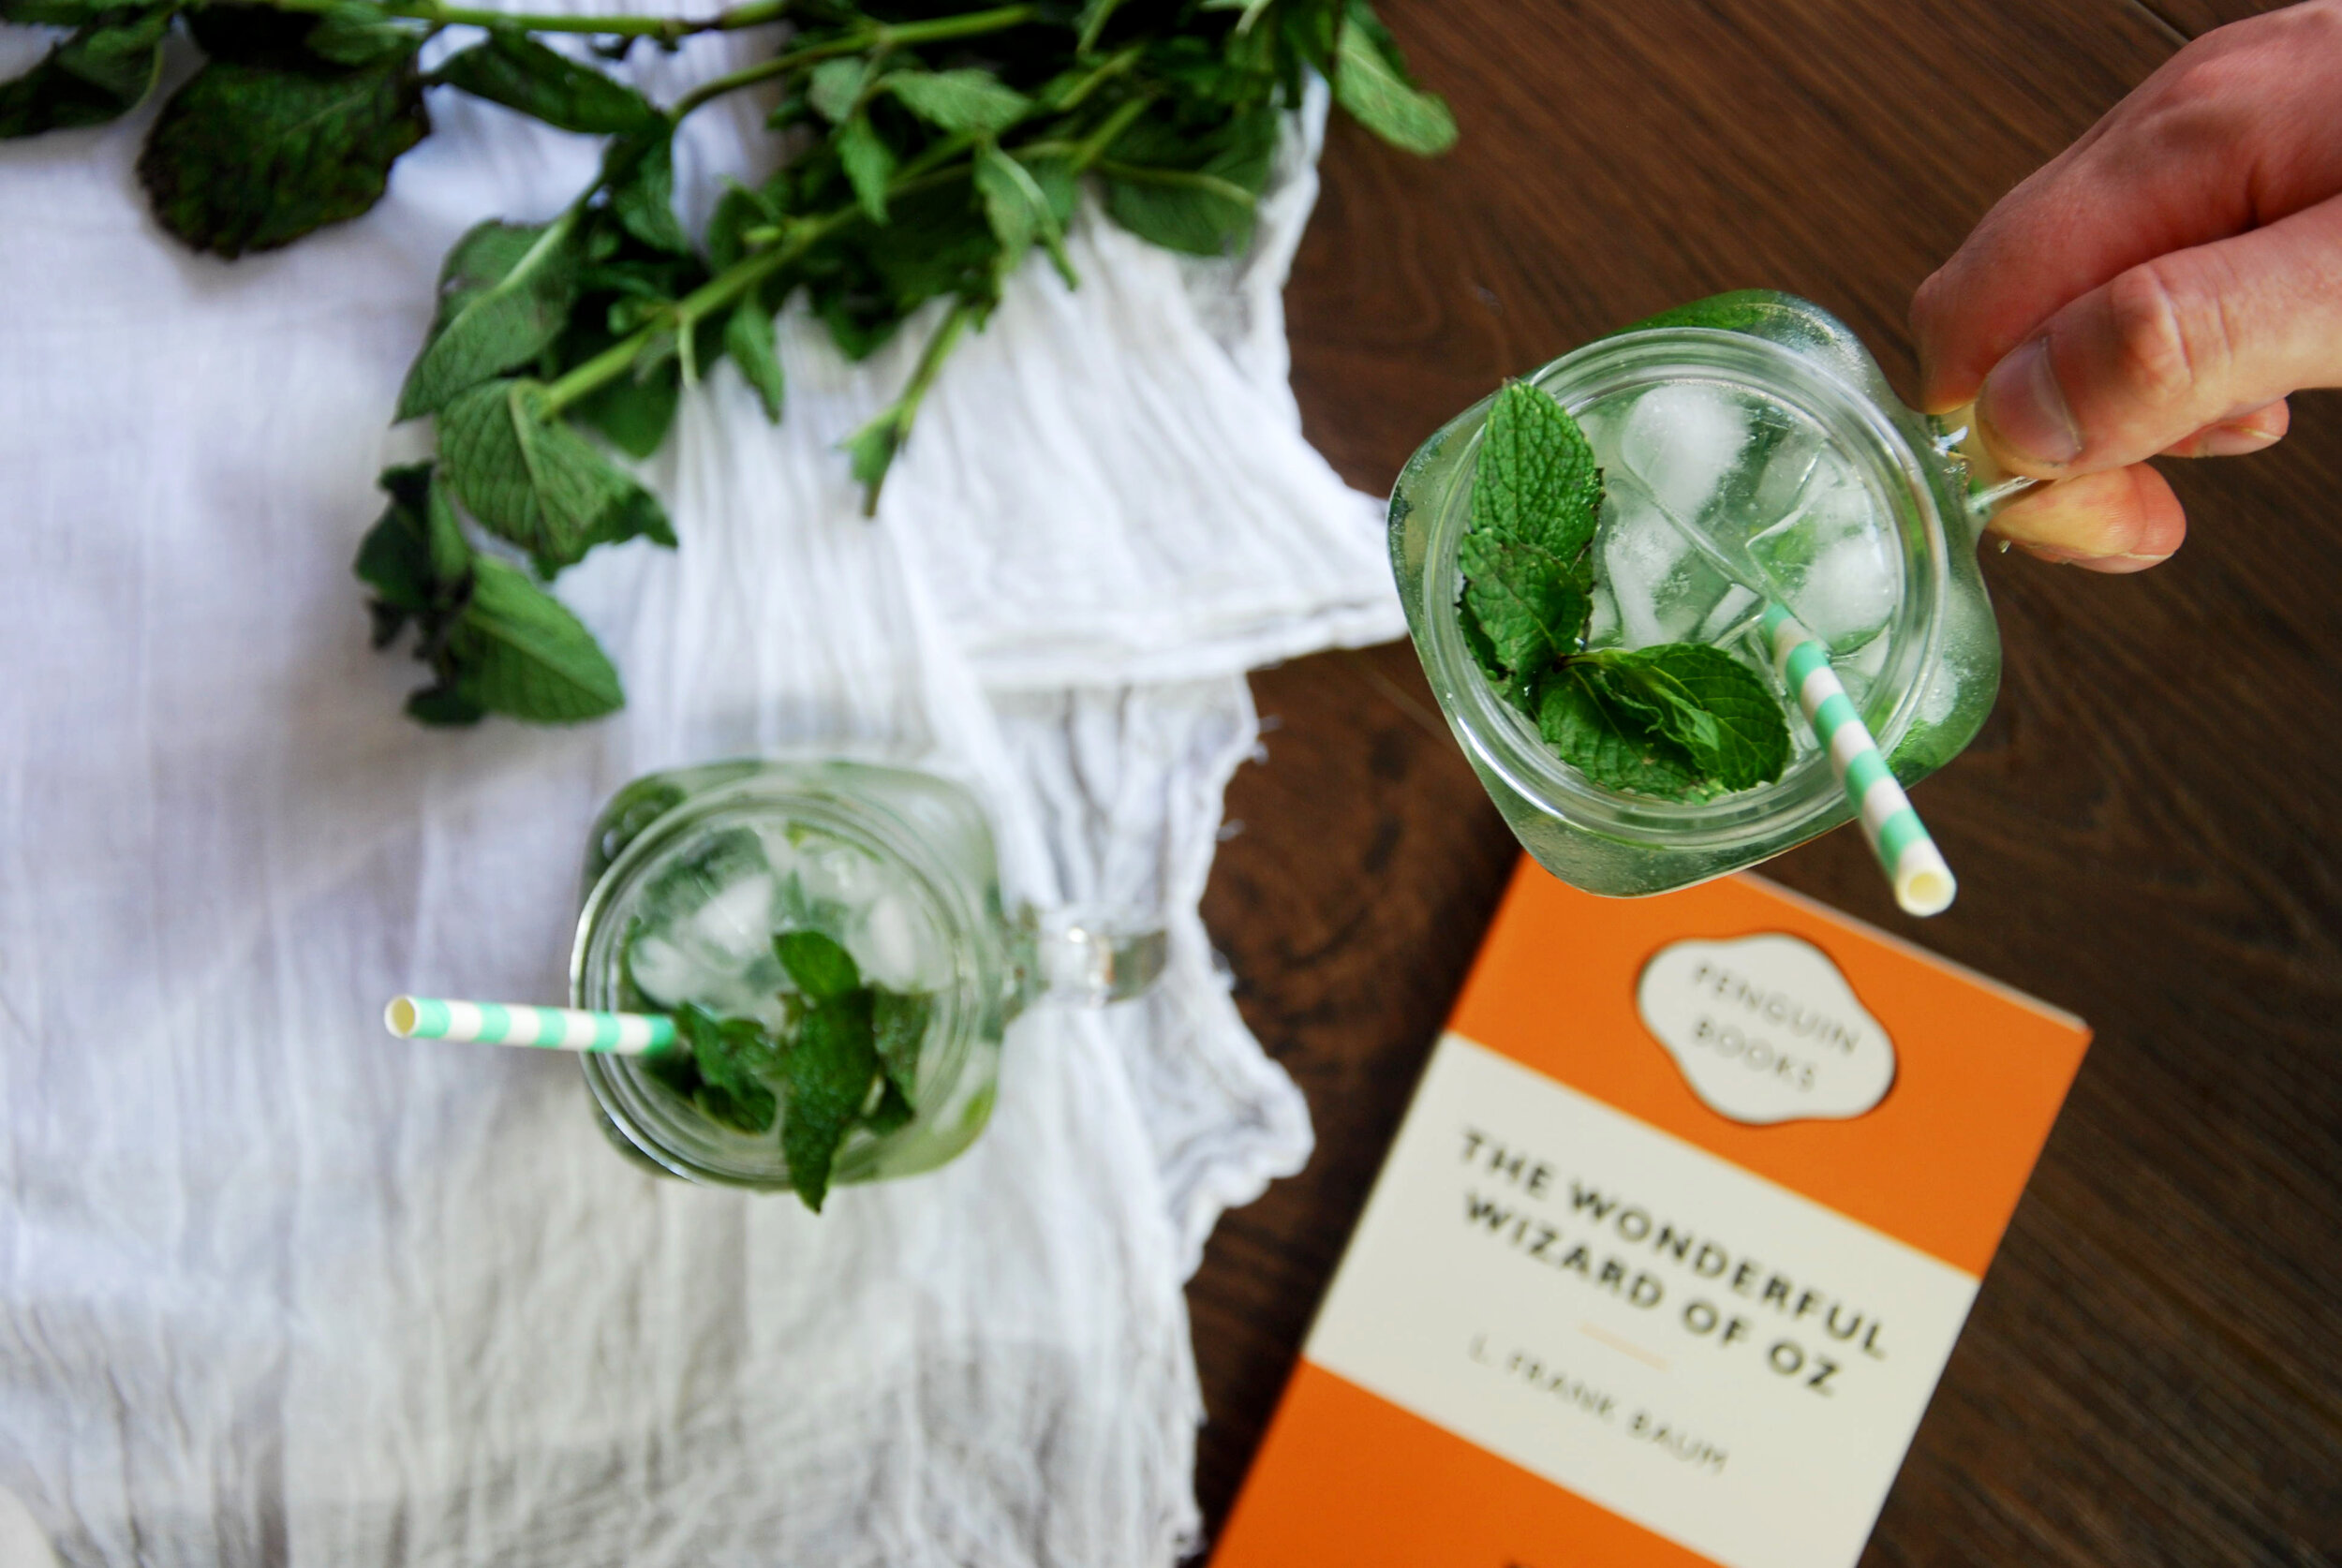
Many shops stood in the street, and Dorothy saw that everything in them was green. Green candy and pop corn were offered for sale, as well as green shoes, green hats, and green clothes of all sorts. At once place a man was selling green lemonade, and when the children bought it Dorothy could see that they paid for it with green pennies.
The Wonderful Wizard of Oz,
L. Frank Baum
My exposure to The Wonderful Wizard of Oz began with the film, like many I'm sure. In fact, I only read the book itself for the first time in the last few weeks, managing to devour it within a single night, a cup of tea being continually refilled as the night grew later. I was lucky enough to get a subscription this Christmas to The Novel Tea Book Club, and the first parcel I received was a delightfully themed trip down the yellow brick road. I'm eagerly anticipating the February book to arrive, enormously curious of what will be in the parcel.
There are an array of food stuffs within the pages of The Wonderful Wizard of Oz that I could have attempted - I'm very much planning to attempt the four different types of cookies that Dorothy enjoys so much - but with summer in full swing, I couldn't go past the chance to make some homemade lemonade. with just a sprig of mint to give it that real Emerald City feel.

This lemonade recipe may look a little strange to Americans, and in all rights as the origins of the book is within America, I should have really stuck to a traditional recipe for it. However, I grew up with bubbly, carbonated lemonade and it's honestly just so much better. If you really aren't a fan, feel free to switch the sparkling water for still.
Mint Lemonade
Makes approx. 4 - 6 glasses
Ingredients
3/4 cup caster sugar
3/4 cup cold water
1 bunch of fresh mint
4 large lemons, juiced
1 - 2 bottles of sparkling water (dependant on how much lemonade you're making)
Ice
Make a simple sugar syrup by combining the sugar and cold water together, stirring well and leaving to sit for around 30 minutes until sugar dissolves.
For each glass of lemonade, place around 4 - 6 mint leaves in the bottom with a dash of the sugar syrup. Using a pestle (if you don't have one use the back of a spoon, works just as well), muddle the mint leaves well - they should be beginning to break up, with the smell of the mint coming out strongly.
Add around 2 tablespoons of lemon juice to each glass (more or less depending on how strong you like it), with an additional tablespoon of sugar syrup before topping with the sparkling water and ice.
Add a few slices of lemon or sprigs of mint as a garnish and enjoy!
Little Women | Apple Turnovers
'There was a momentary lull, broken by Hannah, who stalked in, laid two hot turnovers on the table, and stalked out again. These turnovers were an institution, and the girls called them ‘muffs’, for they had no others and found the hot pies very comforting to their hands on cold mornings.'- Little Women, Louisa May Alcott
There was a momentary lull, broken by Hannah, who stalked in, laid two hot turnovers on the table, and stalked out again. These turnovers were an institution, and the girls called them ‘muffs’, for they had no others and found the hot pies very comforting to their hands on cold mornings.
Little Women
Louisa May Alcott
There's something deliciously comforting about the smell of apples and spices cooking while it rains lightly outside (ignoring the fact that it is summer and despite the rain it's still just so hot). I remember reading Little Women for the first time at a young age - it would be hard to pinpoint when I first picked it up exactly. There are faint memories though that my grandmother passed it to me to read when I was staying with her.

I spent New Years Day at the cinemas, viewing the newest adaptation of Little Women from Greta Gerwig. I absolutely adored it and can't wait to see it again - this may be the only adaptation that I've actually had sympathy for the character of Amy at all. The rest of the day was spent cooking up and eating these pastries as I flicked through my copy of the book, enjoying the small things that jumped out in memory to me.
Apple Turnovers
Makes approx. 8
Ingredients
6 granny smith apples, cored and peeled
3 tbsp raw caster sugar
2 sheets puff pastry
1 1/2 tsp ground cinnamon
1/2 tsp ground nutmeg
1/2 tsp sea salt
1 tbsp butter, melted
2 tbsp water
Preheat the oven to 180C and prepare 2 baking trays with baking paper or by greasing them well.
Dice the apples very finely, they shouldn't be more than a cm large. Place them into a medium sized saucepan along with 2 tbsp water, 1 tbsp raw caster sugar, 1 tsp cinnamon, 1/4 tsp sea salt, and 1/4 tsp of nutmeg. Cook on medium until apples have softened and the water have caramelised a little. Remove from the heat before the apples become too squishy.
Combine the remaining sugar, spices and salt together and mix well. Put to the side till later.
Lay the two sheets of puffy pastry out, slice each down the middle diagonally, and then again in each corner. In the end you should have 8 triangles of pastry.
Spoon the apple mix onto one side of the triangle, folding the other edge over and pressing the edges closed with the prongs of a fork. Repeat with all triangles of pastry and transfer to the baking tray.
Using a fork poke a few holes in the top of each, and brush well with the melted butter. Sprinkle the sugar and cinnamon mix on top before baking for around 15 minutes or until the top of the pastry is golden and brown. Enjoy!
Northern Lights | Olive Oil Gingerbread
"It was a mighty voice, a woman's voice, but a woman with lungs of brass and leather. Lyra looked around for her at once, because this was Ma Costa, who had clouted Lyra on two occasions but given her hot gingerbread on three."- Northern Lights, Phillip Pullman
It was a mighty voice, a woman's voice, but a woman with lungs of brass and leather. Lyra looked around for her at once, because this was Ma Costa, who had clouted Lyra on two occasions but given her hot gingerbread on three.
Northern Lights
Phillip Pullman
This gingerbread was made close to a month ago - created on a day spent babysitting and the realisation that making batches upon batches of cookies was the best way to entertain little ones. I think there was a particular thrill also, making gingerbread so close to Christmas, the spicy scent of it filling the air as it baked.
Like many I'm sure, I spent the later part of the previous year fixed very closely on the TV show of His Dark Materials. I loved it - the casting was superb and I love how firmly the book was followed. It even inspired me to pick up the books again, I had forgotten how incredible they were - I think I likely finished all three within the month.While the gingerbread made by Ma Costa likely wasn't cut into the shape of people, it was sure to have the strong flavours that this one is filled with. And like hers, this is best enjoyed hot from the oven with a cup of tea.
Olive Oil Gingerbread
Makes approx. 16
Ingredients
1/3 cup extra virgin olive oil
3/4 cup raw caster sugar
1/4 cup molasses
1/4 cup milk
2 cups plain flour + 1 tbsp for rolling out dough
1/2 tsp ground cinnamon
1/4 tsp ground nutmeg
1/4 tsp ground cloves
2 tsp ground ginger
1/2 tsp bi-carb soda
1/2 tsp baking powder
1/2 tsp sea salt
Whisk together the oil and sugar until well combined. Add in the molasses and milk, mixing together as best you can. The oil will be tricky to mix in, but just do the best you can.
Sift all dry ingredients together, adding in the combined wet ingredients. Mix until a stiff dough forms. Flatten the dough a little and wrap in cling wrap - chill for at least an hour.
Preheat oven to 180C, line two baking trays for baking paper and put to the side.
Lightly flour a large surface, roll out the chilled dough till it is around 1cm thick, use any cookie cutter (or even the rim of a glass works well, honestly) you want and cut out the shapes wanted. Bundle the cut off dough together and repeat until all the dough is used.
Using a thin spatula, or the edge of a butter knife, gently place the cut out gingerbread shapes onto the prepared trays. Bake for around 8 - 10 mins.
Leave the cookies to cool on the baking tray for at least 2 minutes, to allow them to harden slightly before transferring them to a wire tray to cool completely. Or do as Ma Coster does and serve them hot!
Spice Cookies | We Have Always Lived in the Castle
"In the morning Constance decided to make spice cookies for dinner; that was too bad, because if any of us had known we could have told her not to bother, that Thursday was going to be the last day. Even Uncle Julian did not suspect, however; he felt a little strong on Thursday morning and late in the morning Constance brought him into the kitchen which smell richly of spice cookies and he continued putting his papers into the box."- We Have Always Lived in the Castle, Shirley Jackson
In the morning Constance decided to make spice cookies for dinner; that was too bad, because if any of us had known we could have told her not to bother, that Thursday was going to be the last day. Even Uncle Julian did not suspect, however; he felt a little strong on Thursday morning and late in the morning Constance brought him into the kitchen which smell richly of spice cookies and he continued putting his papers into the box.
We Have Always Lived in the Castle
Shirley Jackson
I’m a few days late with my latest recipe post but I wanted to try and stretch this one out for Halloween. Halloween isn’t something that has been been hugely celebrated within Australia, but I’ve noticed in the last few years that more and more children seem to be on the street trick or treating, and I really can’t argue against children being cute in costumes. We handed out an array of lollies and icy poles last night as they came knocking, the frozen treat greatly appreciated by many in the hot weather.
I picked up Shirley Jackson’s We Have Always Lived in the Castle at random a few weeks ago, having finished the book I had on me over lunch and wanting another for the train back home. I ended up loving it. A gothic mystery story, the entirety of the book was filled with an array of descriptive foods and thoughts - described in a way that utterly captivated me. It was hard to choose exactly what food I wanted to explore from it (I may try my hand at Constance’s special rum cakes in the future), but ended up deciding on Spice Cookies.
Also, before we get to the recipe part. Yes these are quite burnt. My oven as always, is terrible for baking and there is no way to regulate temperature basically. I did do a second batch the next day and realised that I just needed to be shifting them around inside the oven and covering them with foil for a little bit. No need to do that yourselves, unless you also have an oven from the 70's (that they don't make parts for anymore - it's been missing a handle for three years) that is utterly terrible for baking of any sort. I will likely remake them again another day and do some nicer photographs but eh, this is kinda what happens sometimes.
These cookies are amazing, a gingerbready delight of spices, the perfect snack to have with a tea or hot chocolate. I took numerous batches to work and they all disappeared quite quickly. I sourced the recipe from here, but ended up changing around a few measurements and ingredients to better suit what I wanted.
Spice Cookies
Makes approx. 16
Ingredients
2 1/4 cup plain
2 1/2 tsp baking powder
2 tsp ground cinnamon
1 tsp ground nutmeg
2 tsp ground ginger
1 tsp ground cardamon
1/4 tsp sea salt
115g butter, melted
2/3 cup brown sugar
1/2 cup molasses
1/2 tsp vanilla extract
3 tbsp raw sugar, for rolling the cookies in
Preheat oven to 180C and prepare two baking trays with a layer of baking paper.
Combine plain flour, baking powder, all spices and salt together in a bowl and combine well.
In a seperate bowl, combine the melted butter with the brown sugar, vanilla and molasses.
Combine the wet ingredients with the dry and mix until combined, it should form a soft dough - if it feels too wet, add a touch more flour.
Cover and refrigerate for approx. 30 minutes.
Roll the cookie dough into balls (size is up to you, but try not to make them too giant) that are all roughly the same size, press the tops down into the raw sugar and flatten slightly.
Place the cookies onto the prepared trays and bake for 10 - 12 minutes, or until the cookies have expanded and are cracking on top slightly.
Leave on the tray to cool for at least five minutes before placing onto a cooling rack. Enjoy!
Cheesymite Scrolls | Possum Magic
'It was there, in the far north of Australia,that they found a Vegemite sandwich.Grandma Poss crossed her claws and crossed her feet.Hush breathed deeply and began to eat."A tail! A tail!" shouted both possums at once.For there it was. A brand new, visible tail!'- Possum Magic, Mem Fox
It was there, in the far north of Australia,
that they found a Vegemite sandwich.
Grandma Poss crossed her claws and crossed her feet.
Hush breathed deeply and began to eat.
’A tail! A tail!’ shouted both possums at once.
For there it was. A brand new, visible tail!
Possum Magic
Mem Fox
Daylight savings has arrived in Melbourne, and the longer days are leaving me wanting to bake doughs that require hours to rise. To leave the house smelling like fresh baked bread every morning and to enjoy thick slices layered with butter and jams. Which, luckily, is basically what I can do every weekend. A friend dropped around some Seville orange marmalade she whipped up also recently, I’m sure that will go down a treat with the next bread batch (or crumpets, if the mood strikes).
My favourite bookstore in all of the city is one called Readings. It’s multiple shelves of books that line the walls give off an aura of comfort, along with the fact that it is open most days till 11pm. There’s nothing like a few pints, followed by an excessive book shopping spree. On a recent browse throughout the store, I wandered into their sister store next door - Readings Kids. While my attention was mostly focused upon the elaborate and beautiful editions of some classic children’s novels I’d read at a young age, I found myself flipping through a copy of Possum Magic.

I doubt there is a child in Australia that has not had Possum Magic read to them at one stage in their life. Mine was from my librarian within my primary school - a woman that I can still remember with such strong, fond feelings, despite not being able to recall even the slightest memory of her face or name. The book is a beautiful adventure of Hush and Grandma Poss, exploring so many Australian concepts and delights.
This recipe was definitely inspired by the reread I hurriedly undertook within the store, the joyful memories of my first interaction coming back to me as I flipped through the pages. I baked a full batch of cheesymite scrolls for a charity bake sale that coming weekend - followed by another batch to carry along to a middle eastern inspired breakfast thrown by a friend. All disappeared quite briefly.
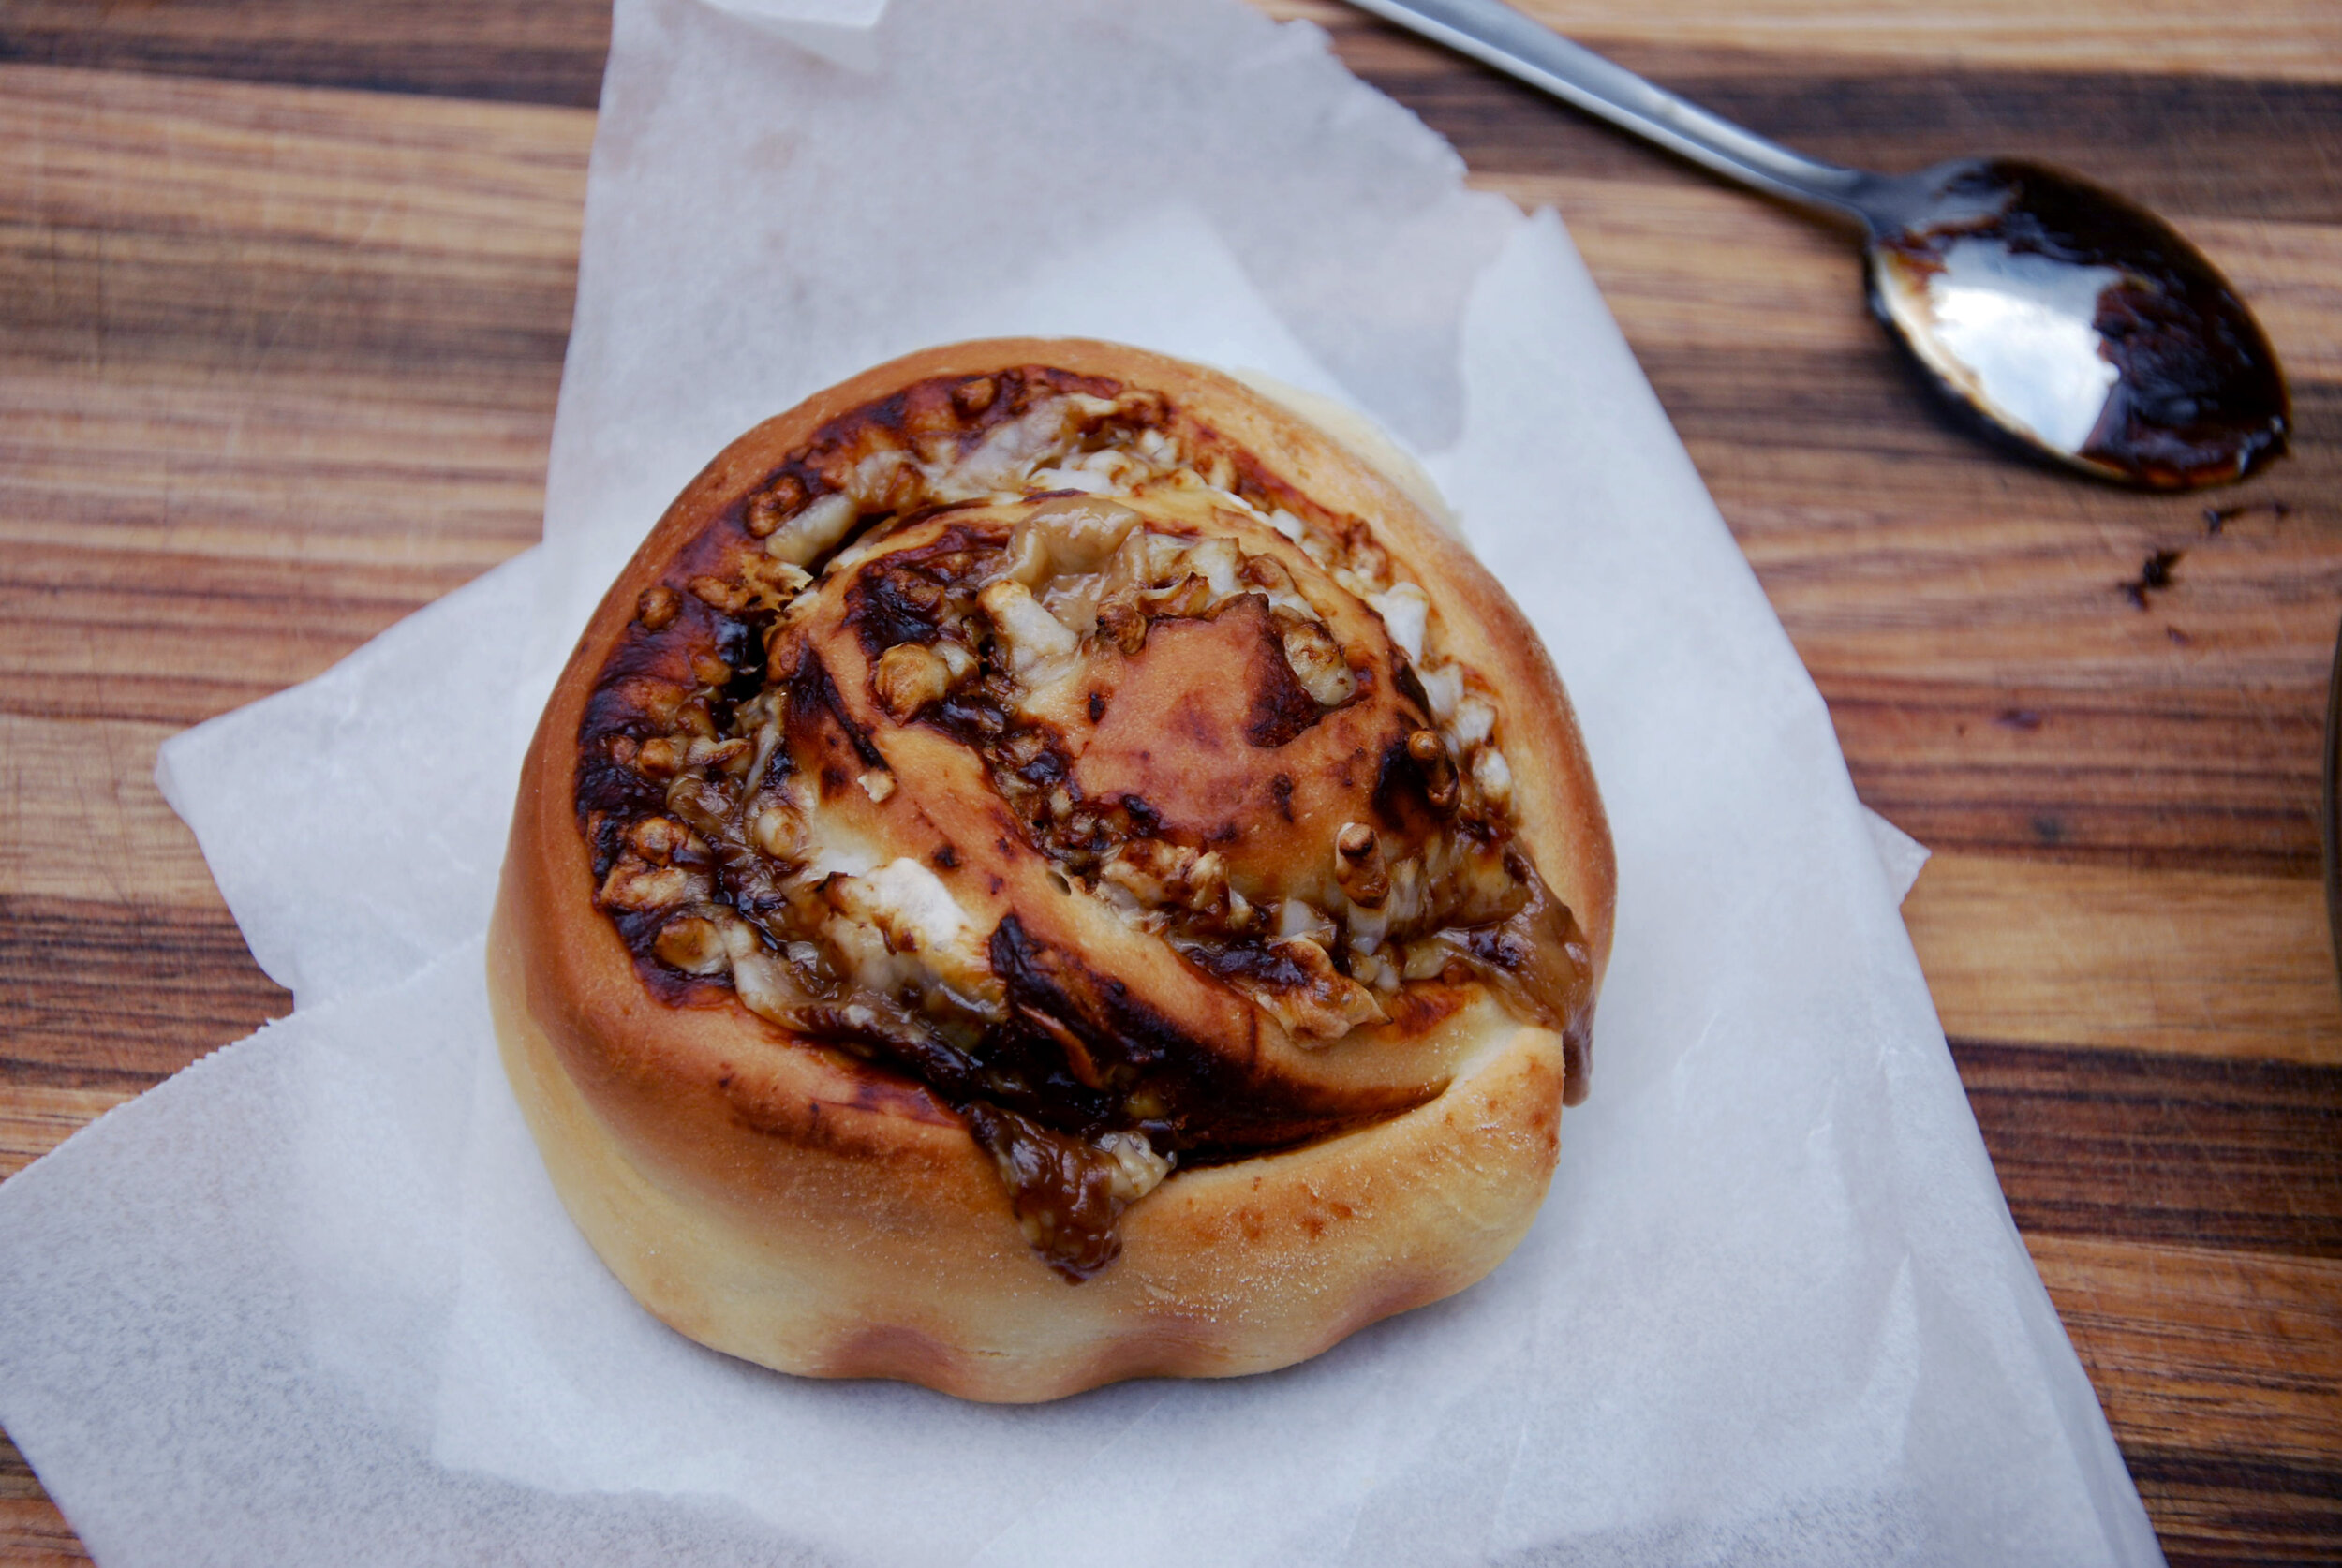
This recipe for Cheesymite scrolls is a classic Australian one, that every Australian likely has had once. This recipe is from Smith & Deli's cookbook - and produces the most delicious scrolls.
*Note: I used a stand mixer with a dough hook for this - but totally fine to do it by hand. Just knead it for an extra five minutes or so.
Cheesymite Scrolls
Makes approx 12 scrolls
Ingredients
2 tsp instant yeast
2 tbsp caster sugar
375ml cups lukewarm water
525g plain flour + 2 tbsp for dusting later
2 tsp salt
90ml olive oil
4 tbsp Vegemite, mixed with 2 tbsp water
250g grated cheese
30g butter, melted
Combine the warm water, yeast and caster sugar together in a bowl. Leave for a few minutes or until frothy.
Combine the flour and salt together in the bowl of your mixer* (see note), using the dough hook attachment.
Add the oil to the flour mixture, and add in your forty yeast while the mixer is slowly running. The dough should come together and be quite soft, if it is too sticky add another few tablespoons of flour. Leave in the mixer to knead for another five minutes or so.
Cover the dough with a clean cloth, and leave in a warm place to rise until it has doubled in size, or at least thirty minutes.
Preheat your oven to 190C.
Dust a bench or board with the remaining flour, and being your raised dough out onto it. Roll the dough into a rough rectangle, so that the dough is no more than a few centimetres thick.
Using a silicone spatula if you have one, or the back of a spoon, spread the Vegemite thickly over the rolled out dough, getting it right into each corner. Follow that up by covering the Vegemite with a good layer of cheese - the cheesier the better, of course.
Starting at one end, roll the dough up tightly and cut slices off to form the scrolls. Each slice should be approximately 8cm thick.
Place the scrolls into a baking pan that is either lined with baking paper or well greased, and leave to sit covered for another thirty minutes or so or until the scrolls have doubled in size.
Brush the tops of the risen scrolls with the melted butter and pop into the oven for around twenty minutes.
Enjoy! Best eaten hot and gooey from the oven with a cup of coffee.
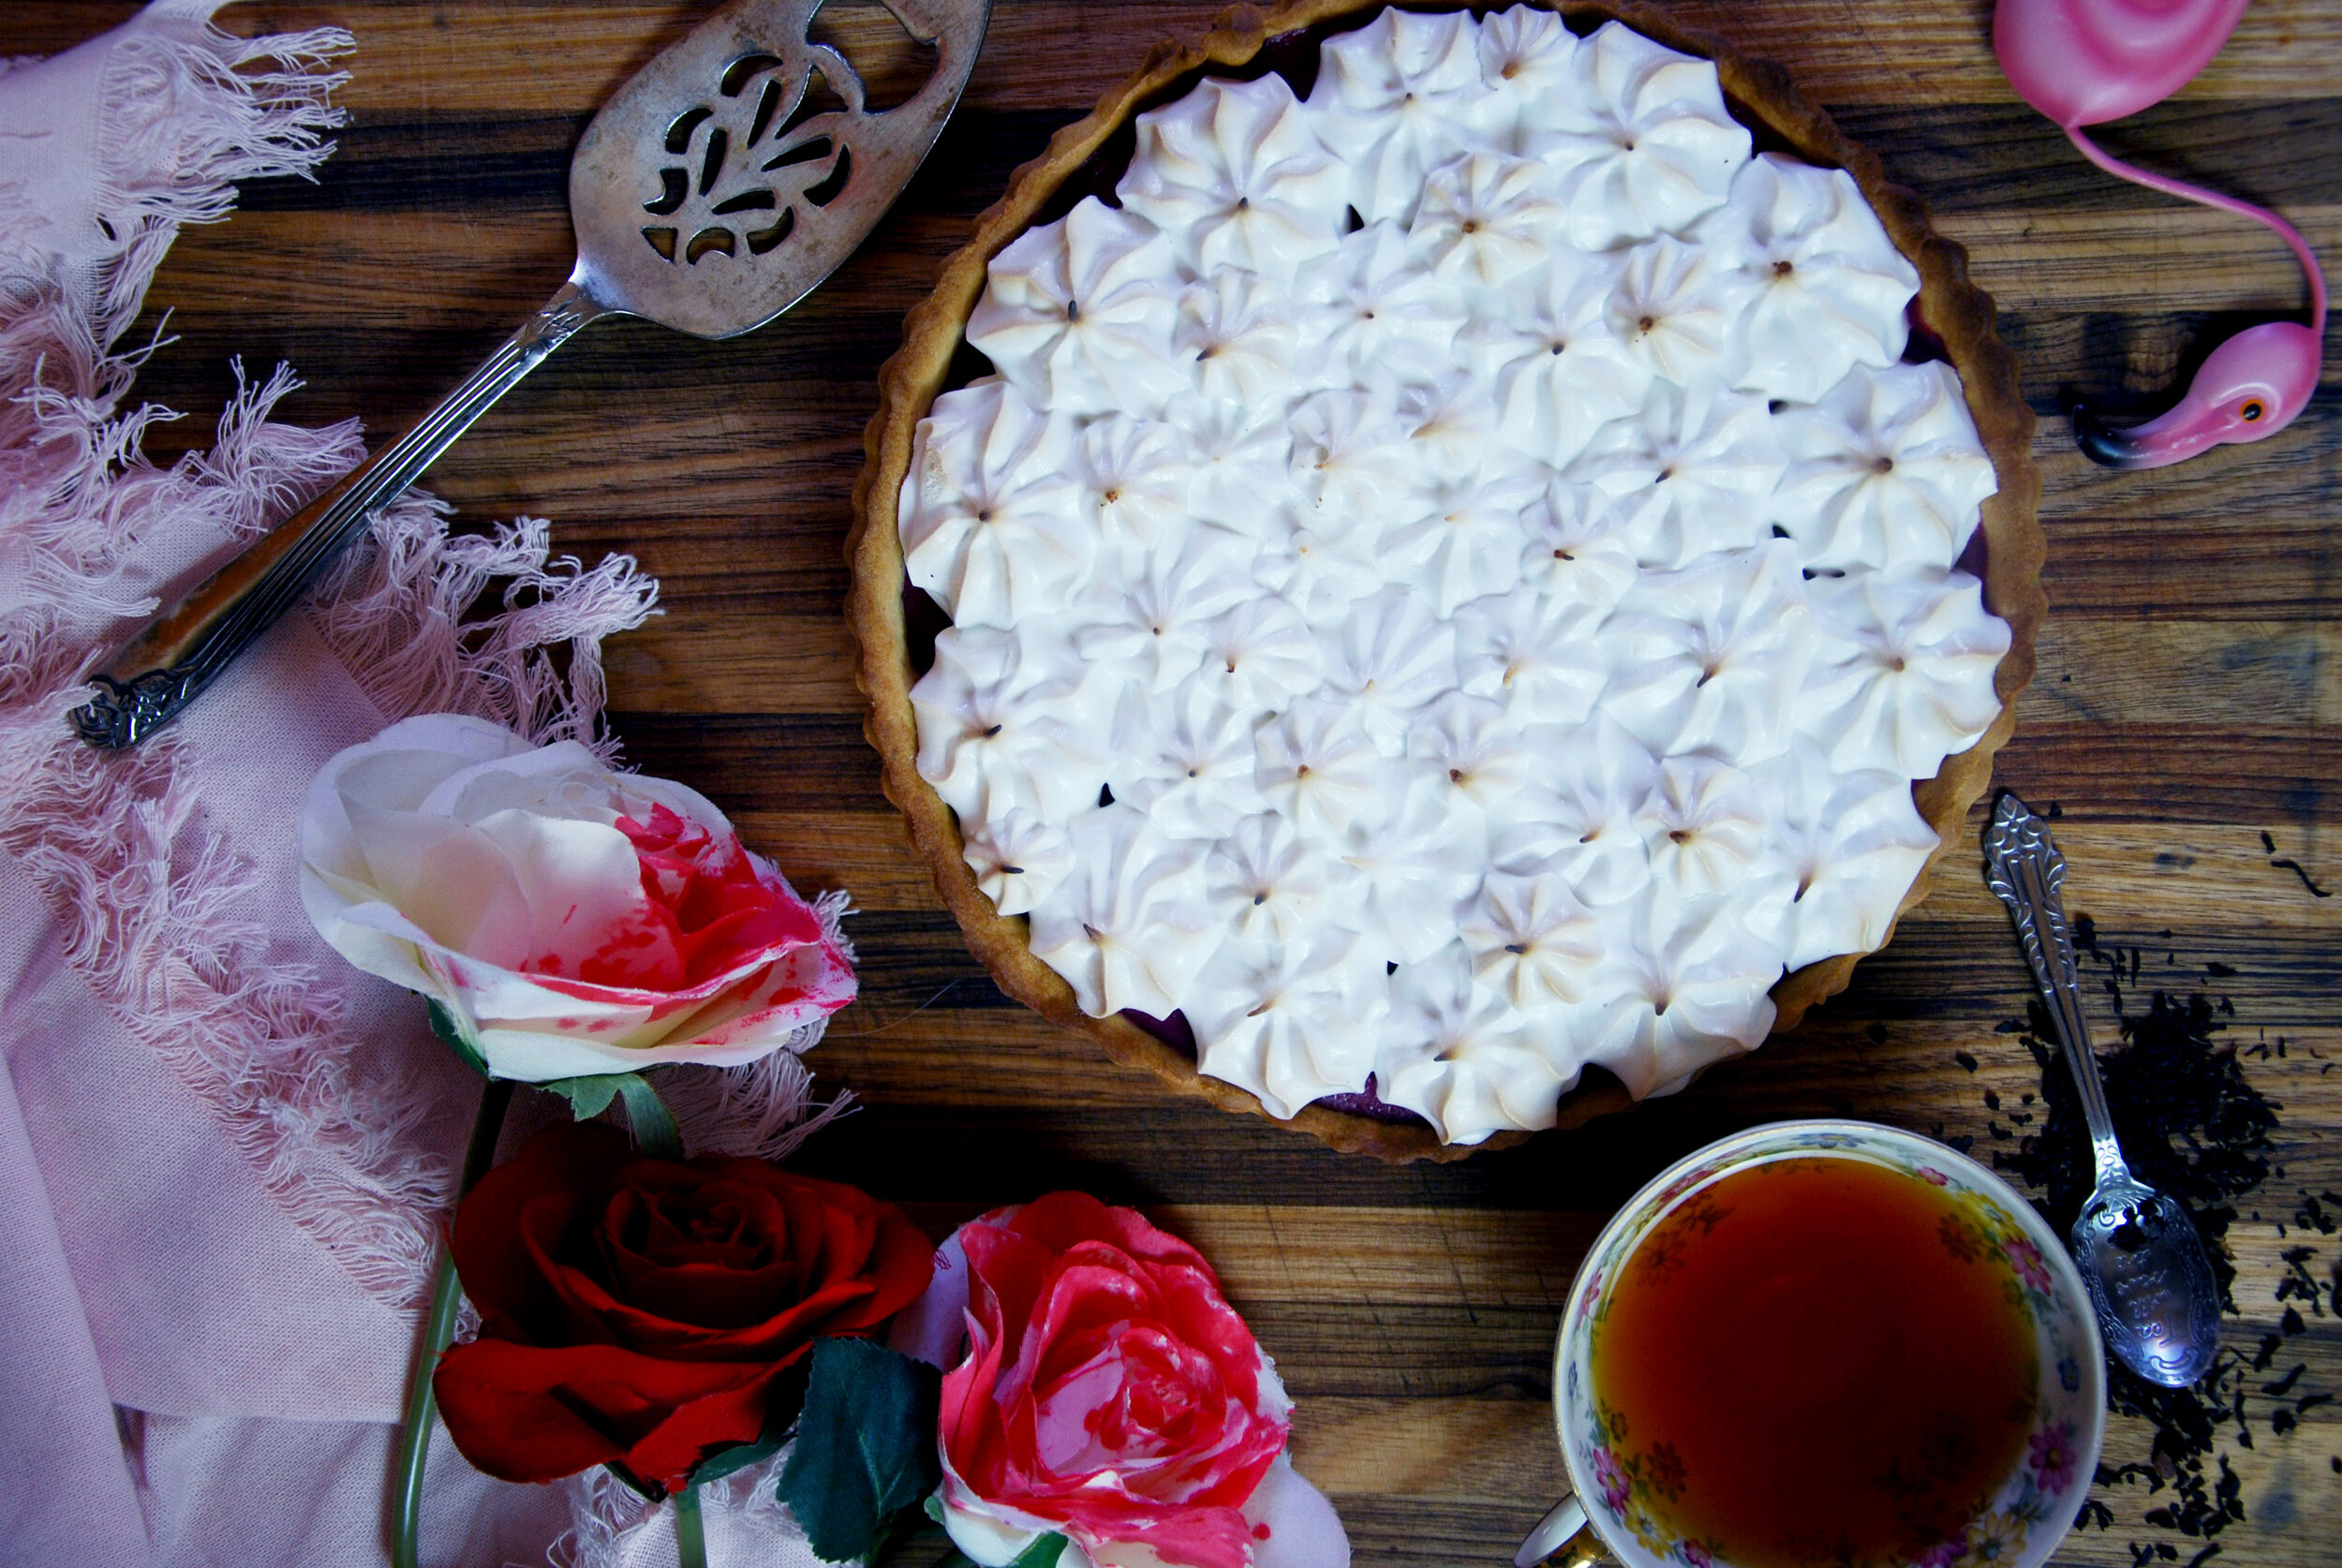
Raspberry Meringue Tart | Alice's Adventures in Wonderland
"The Queen of Hearts, she made some tarts,All on a summer day:The Knave of Hearts, he stole those tarts,And took them quite away!"- Alice's Adventures in Wonderland
‘The Queen of Hearts, she made some tarts,
All on a summer day:
The Knave of Hearts, he stole those tarts,
And took them quite away!"
Alice's Adventures in Wonderland, Lewis Caroll
When I first moved to Melbourne at the age of 19, I began working at a tiny cafe near my house. Looking back - getting paid $14 an hour and working ridiculous shifts, really wasn't worth it or really that legal unfortunately. However, it did mean that I met a very good friend of mine, Laura. Her and her partner were regulars at the cafe, coming in almost every weekend. When I stopped working there, it was quite sudden and I did not have the opportunity to really say good to anyone - only a few months later though, at a showing of Harry Potter and the Deathly Hallows Pt 2 I spotted Laura, perched outside with a wand ready. We exchanged contact details - and since then, her and her partner have moved to Brisbane, but we've also travelled together and put effort in to make sure that we see most Marvel movies together.

She is also a absolutely huge Alice in Wonderland fan, and this year I planned an Alice in Wonderland Tea Party for her when she was down visiting. A weekend of op-shopping and cooking ensured that I put together a tea party that would make the Mad Hatter proud and leave all guests tumbling down the rabbit hole.Despite theming the whole tea party around Alice in Wonderland, I sort of missed out on making what I really wanted to, the Queen of Hearts' tart. So, obviously the solution was to wait till a rainy night months later to attempt to make it.
You will need a 25cm tart case and ideally a candy thermometer and a standmixer/electric beater but can be done without. You can use this method if you don’t have a candy thermometer https://www.thespruceeats.com/making-candy-without-a-candy-thermometer-520309.
*Note: if using fresh raspberries, up the ¼ cup of milk to ¾ a cup.
Raspberry Meringue Tart
Makes one large tart (25cm across)
Tart Pastry
550g plain flour
50g caster sugar
220g butter
185ml milk
Raspberry Filling
1 cup caster sugar
½ cup corn flour
1 tsp agar agar powder
1 lemon, zested and juiced
200g raspberries, fresh or frozen
¼ cup milk *see note
½ tsp vanilla extract
Meringue
½ cup chickpea liquid (the juice from a can of chickpeas!)
½ tsp cream of tartar60ml water
1 1/2 cup caster sugar
1 tsp agar agar powder
Tart Pastry
Combine the sugar and flour in a large mixing bowl, adding in pieces of the butter and using your fingers to mix them. The result should resemble wet sand.
Make a well in the middle and pour in the milk, mixing until the pastry comes together into a ball.
Wrap in cling wrap and refrigerate for at least 30 minutes before use.
Preheat oven to 160C.
When the dough has had time to rest, prepare a 25cm tart case with cooking spray or butter.
Lightly dust a surface with flour and roll out the pastry dough until it approx. 5mm thick – ensure that the pastry has been rolled out to a sixe wider than the tart case and gently place the pastry into the prepared case, pressing the pastry into the corners. Trim any overhanging edges.
Line the pastry with baking paper, using baking beads or even rice/dried beans to weight it down. Blind bake for 20 minutes and leave to cool.
Raspberry Filling
Place all ingredients into a medium sized saucepan on a medium heat. Ensure that all ingredients have been well mixed together – mashing the raspberries when necessary.
Continue to heat on medium, stirring occasionally until the mixture resembles that of a pudding consistency.
Remove from heat and strain the mix through a fine mesh sieve or some cheesecloth – essentially you’re just trying to get all the seeds from the raspberries out. If you prefer you can totally leave them in.
Pour the raspberry filling into the prepared pastry and refrigerate overnight or at least for three hours (it will take a little while to set properly).
Meringue
Combine the chickpea liquid and the cream of tartar together and beat until stiff peaks form. It will take a few minutes – probably longer if you’re doing this by hand, though it is an amazing workout.
Combine the agar agar, water and sugar together in a small saucepan – heating until it reaches around 112C.
While beating the meringue, slowly pour in the hot sugar mixture, continuing to beat for the next 8 minutes or so – until the meringue has cooled.
When the meringue is ready, you can either use a piping bag or just a spoon to pop the meringue on top of the prepared raspberry tart – as much as you like.
A blowtorch is best – but if you don’t have one, like me, you can pop the tart into a low heat oven for a little or even use a few matches (I did this – didn’t work that great).
Leave for about 30 minutes to let the meringue set a little before cutting into the tart. Enjoy!